This is a quick guide on getting started with 3D Issue Apps. With this we’ll run through the basics of creating your first app.
- After logging into apps for the first time you’ll be prompted to create your first app.
- Fill in the App name
- For App Type select the appropriate type. For now however, lets select Standard. You can read more about the App types here.
- Click Create
- You’ll be brought to the Content page. In this page you’ll create sections and add content sources to them. Read about sections here or sources here.
- Select the + icon in the top left to add sections. You can rename the sections using the pencil / edit icon next to the section names.
- Select a section in the left panel then choose a content type to add to it as a source. Each section can have multiple sources, even of different types.
- When you are happy with the content you have added click Continue in the bottom right corner of the page.
- On the next page you’ll need to select a template. You can select from one of our prebuilt designs or select to create your own.
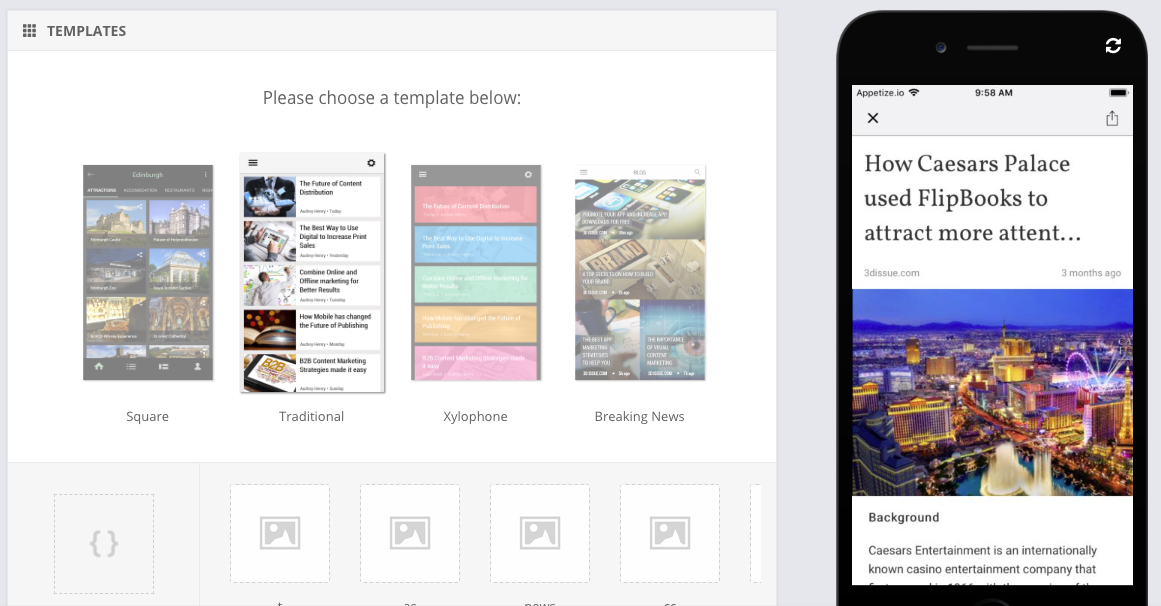 You can preview the design with all your content, live in the emulator to the right.
Click continue. - The next page will allow you to customise the colors, graphics and even some of the behaviours of the app. Start by selecting Save As in the top right corner to save the template as your own. You can read more about customising sections and the available options over here.
- Clicking continue will bring you to the final page, with instructions on viewing your app in the App Portal app.
- Going back to the Apps Dashboard will give you options to purchase / submit the app to Apple & Google. You can read more on that here.