

On occasion, and depending on the source PDF, imported images might not display exactly as desired. For this reason, Flow provides multiple options for making adjustments to imported images, including cropping, resizing and recapturing.
Cropping
To crop an image, expand its tab on the Canvas by clicking on the three dots, and click on the crop icon. This will open the Crop Tool.

From here, drag the image bounds inwards to frame the image as required, and click ‘OK’ to apply the crop. The crop tool will close and the image will update to the cropped version on the canvas. You can repeat this process to crop the image again, or click on ‘Revert’ in the Crop Tool to restore the image to its original state.
Resizing
You can vertically resize the frame in which an image resides by clicking and dragging on the resize handle at the bottom of the element. This appears as a small circle, and your cursor will change to vertical arrows when hovered over it.

Once resized vertically, the way in which the actual image occupies the image element can be changed using the ‘Settings’ section of the Properties Control Column by changing the ‘Layout’ setting.
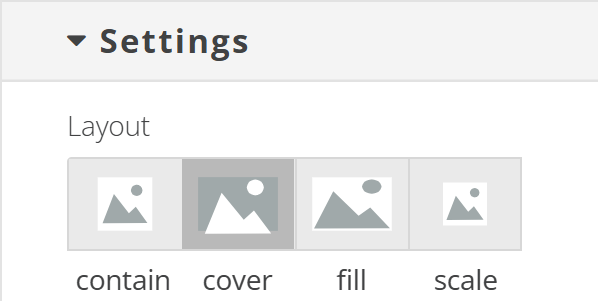
Options available are as follows:
- Contain
Scales the image to ensure that the whole image is visible. - Cover
Scales the image proportionally to ensure that the whole element is covered by the image. - Fill
Scales the image to ensure that the whole element is covered by the image. If the width:height ratios of the element and the image are different, the image will be stretched to cover the element. - Scale
The image will be scaled down to fit the containing element.
Recapturing
In some cases you may want to recapture an image from the source PDF and completely replace an image on the canvas with the recaptured image. To do so:

- Click on the ‘edit crop areas’ icon above the Flow Canvas.
- Click and drag to select an area from the page to import as an image. You can select multiple areas by holding the shift key as you drag.
- You can adjust the position of selected areas on the page by clicking and dragging the arrow icon, or adjust the selection bounds by clicking and dragging on the circular handles around the perimeter of the selection. Erroneously selected areas can be deleted by clicking on the trash can icon within the selection.
- Select the ‘Add to Page’ checkbox to immediately add the newly extracted images to the end of the page of your Flow project or
- Leave the ‘Add to Page’ checkbox unchecked to add the newly extracted images to the Media Library. You can then swap the existing images for the new captures by double-clicking them on the canvas and selecting the new image from the Media Library.