Learn about Image Galleries in Flipbooks Online
Image galleries can be added to Flipbooks in two ways;
- Pop-up via Hotspots and buttons
- Embedded on the page.
To add an image gallery follow the steps below;
- Select the image gallery tool from the interactive panel on the left of the Flipbook editor.
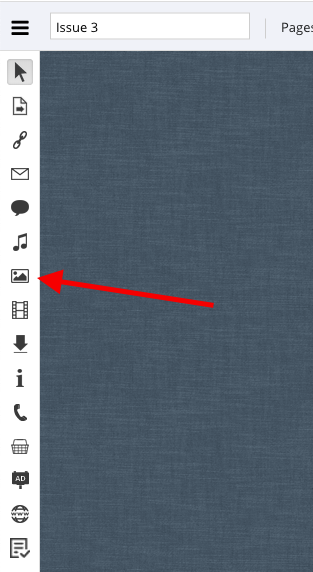
- Using the image gallery tool draw a box on your Flipbook page, where you would like the image gallery or button to show.
- You’ll then be prompted with the Image Gallery editor.
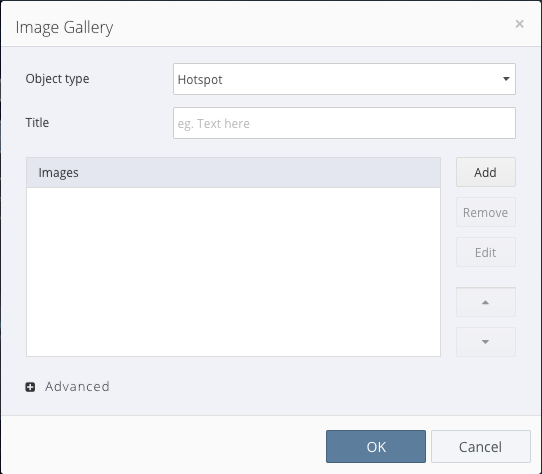
- Add a title and add your images to the panel by Clicking Add
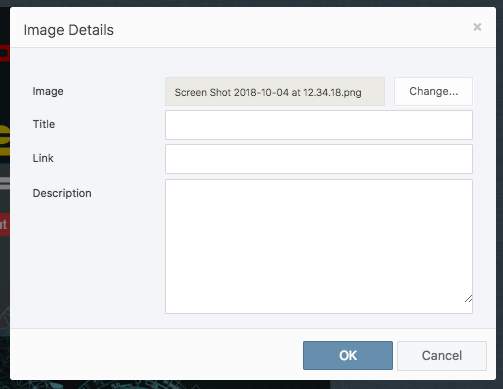
- When adding an image a new prompt will open. This will let you upload your image, give it a title, a web link and a text description. The web link will be added so that taps on your image will open the link.
You can use the buttons on the right of the Image Gallery editor to organise the image for your gallery.
The Object Type field will allow you to change the Image Gallery mode from Hotspot to a button or embedded image gallery.
Advanced
In the advanced panel of the Image Gallery editor you can choose to modify the behaviour of your Image Gallery.
Autoplay
This enables a slideshow mode for the image gallery. The gallery will transition images based on the time you select.
Transition
This allows you to select the transition animation type and duration of the animation.