- Open the 3D Issue software. Along the top of the software you should see the application Menu with options like File, Edit, View…
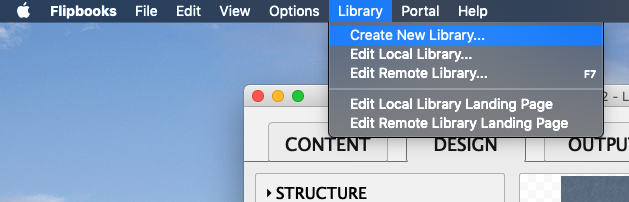
- Select the Library Menu then Select Create New Library.
Alternatively: You can select Edit remote Library, this will open the library file existing on your server or create a new one on your server automatically. This does rely on the Upload settings in the Output tab of 3D Issue however. - A window will open prompting you to save the file, we recommend saving the file as library.xml, you can save the file anywhere on your computer. Click Save
- A new Window will open.
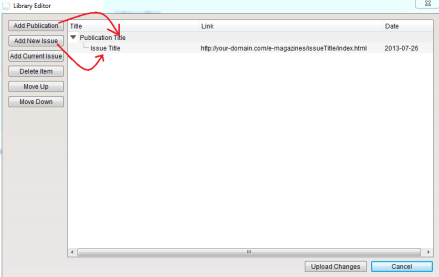
- The first thing you’ll need to do now is add a Publication. Using the Add Publication button on the top left of the window. The publication just consists of a Title.
- Once you have added the publication you can proceed to add Issues to the publication. Make sure to add the correct URLs and ensure that dates are added otherwise your issues will not get sorted correctly in the App!
- When Happy with the library you have you can select Save Changes on the bottom Right. Once you have the library file it can be uploaded to your server. Or Upload Changes if you selected to edit the remote library.
Creating a Library
Updated on September 28, 2018