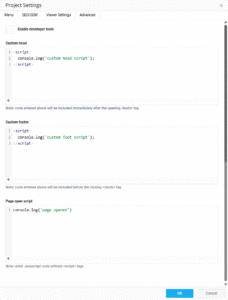
When Developer Tools are activated, through the Advanced tab of the Project Settings panel, additional options become available, allowing developers to directly edit the code behind your Experios publication.
When active, two additional icons will appear at the top of the Canvas, immediately to the right of the Project Title.

The Tag icon will open the Experios Code Editor, in a new browser tab/window. This allows for direct access to the underlying HTML and CSS code for the current page.
Changes made using the Code Editor won’t be reflected live on the Canvas. After saving your changes, click on the Reload icon to see the changes you have made to your page.
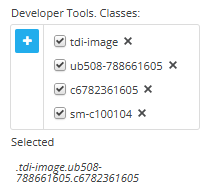
When Developer Tools are enabled, developers can also add/remove an element’s CSS classes. This can be done at the bottom of the Properties Control Column, underneath the Accessibility section. Classes can be added using the blue + icon, and removed using the x next to a classname.

In addition, Experios Developer Tools enables the addition of custom code at the head or foot of your publication’s html, or to run a script when a user opens a publication. These options are accessible through Project Settings under the ‘Advanced’ tab.

When adding code to these fields, it is important to include script tags for the Custom Head and Foot code, while excluding tags for the Page Open Script, as shown in the image above.
Scripts run in the following order Custom Head > Custom Foot > Page Open.
