Using Experios it is possible to extract text and images form PDF files directly into a project using our Article Importer. This allows you to easily reformat content from a fixed layout to an accessible and responsive design, suitable for delivery on the web.

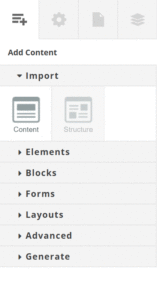
To begin extracting an article from a PDF, click on the Content icon in the Add Content Control Column. This will open a your system’s file selection dialogue.
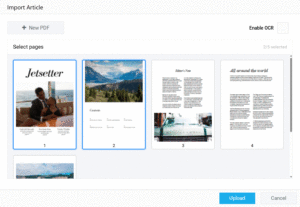
Using this, navigate to and select, the desired PDF file. After a few seconds, the pages from the PDF will be displayed, allowing individual pages to be selected for importing to your project.

At this point, you can choose to select a different PDF for import. If you are happy with the currently selected PDF, select a page and click on ‘Upload’ to extract the page content to your project. Up to 10 pages can be selected using the Ctrl (Command on Apple Systems) and Shift keys.
By default, the Article Importer only reads text that is present in the PDF as text. If you are importing a rasterized PDF, or a PDF which has text on images that needs to be extracted, check the ‘Enable OCR’ (Optical Character Recognition) checkbox at the top right of the Import Article dialogue. If your imported content is missing sections of text from the original PDF, try enabling OCR.
Once the relevant pages have been selected and uploaded, their contents will be added to the end of the page currently being edited on the Experios Canvas. Experios will arrange elements in a web-friendly single responsive column. This column defaults to 700px wide, but you can change this by editing the Brand associated with the project. When imported, elements will adhere to the Brand Style associated with the current project. You can, from this point, edit both the style and content of the imported elements in the same way as you would any other element in an Experios project.
Due to the sometimes complex layouts of PDF documents, the Article Importer is trained to import the most relevant text and images from pages. As such, you may find that, for example, smaller, less prominent images on a page will not be imported. In these cases, we recommend that you manually extract the images from the PDF using your system’s screengrab feature. You can then upload them to Experios using the Media Library as normal, before adding them to your project as an Image Element.
Clipping Images from an Imported PDF
When importing from a pdf, the extractor tries to select the most important images from the article. This is to prevent the import from being overloaded with small or background images.
On some occasions, the imported content might not import all of the relevant images. In these cases, images can be manually snipped from the source pdf. To do so:
- Locate, on the Canvas, the row representing the page containing the image you want to snip.
- Click on the Area Selector icon for that row. This will open the corresponding page of the pdf.
- Click and drag on the page to define the area you want to snip. You can create multiple selections by holding the Shift key. You can remove a selection by clicking on the Trash Can icon at the top-right of the selection.
- Click ‘Submit’ to clip the selections from the page.
This will create an Image Element and place it at the end the page’s row on the Experios Canvas. This new Element will initially occupy 100% of the row width. You can us the Element’s properties to resize and reposition the image, as well as edit it in the same way as any other Image Element.

