A Contents Menu can be added using the ‘Project Settings’ panel (opened by clicking on the cog at the top of your edit screen). The contents menu can be used to link to different pages within your publication, as well as to external websites.
Contents menus are organised heirarchically, with root-level items being the most prominent. Each root-level item can contain multiple sub-items, and sub-items can contain further sub-items if necessary (up to a maximum of 20 levels of sub-item).
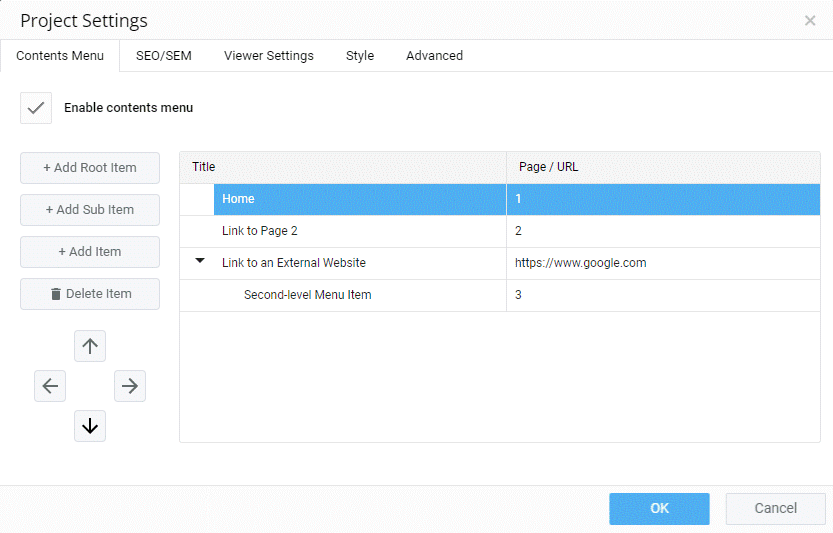
Adding a Contents Menu
A Contents Menu can be added from within the Project Settings panel by selecting the Contents Menu tab.
All Contents Menus must contain at least one root item, so click on ‘+ Add Root Item’ to begin. Your new root item will appear in the table on the right-hand side of the panel, allowing you to enter a title for the item as well as a destination for it to link to. In order to link to a page within your publication, enter the page number. In order to link to an external website, enter the url of the website.
From here you can build out the rest of your contents menu as follows:
Add Root Item – Creates a new top-level menu item
Add Sub Item – Creates a child item under the currently selected item
Add Item – Creates an item at the same level as the currently selected item
The arrow buttons underneath the add buttons can be used to move items around within the structure of your menu.
To make your Contents Menu active, check the ‘Enable contents menu’ checkbox.
Styling a Contents Menu
Within the Project Settings panel, select the ‘Viewer Settings’ Tab.
In the ‘Menu’ settings group, you will see options allowing you to change the type, position and colours of your menu. You can also select to show/hide your menu depending on device type, and whether or not your menu should be fullscreen or contain a search bar.