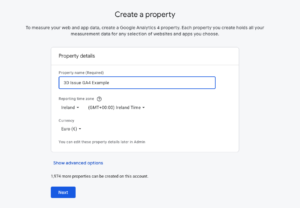
- In your Google Analytics account admin area, create a new property. Give the property a relevant name and set the Time Zone and also a currency (even if this is not needed for your publication tracking). Click ‘Next’.
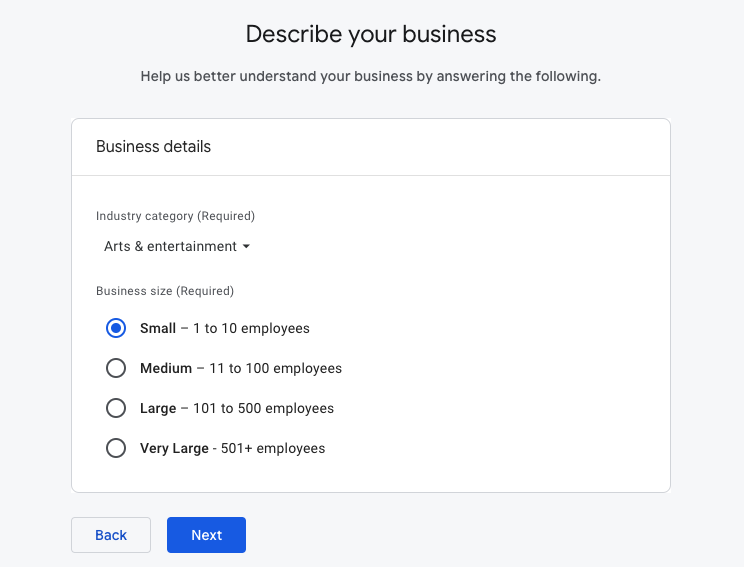
- Set your industry category and give an estimate of your company size. Click ‘Next’.

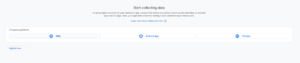
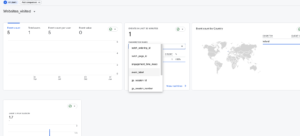
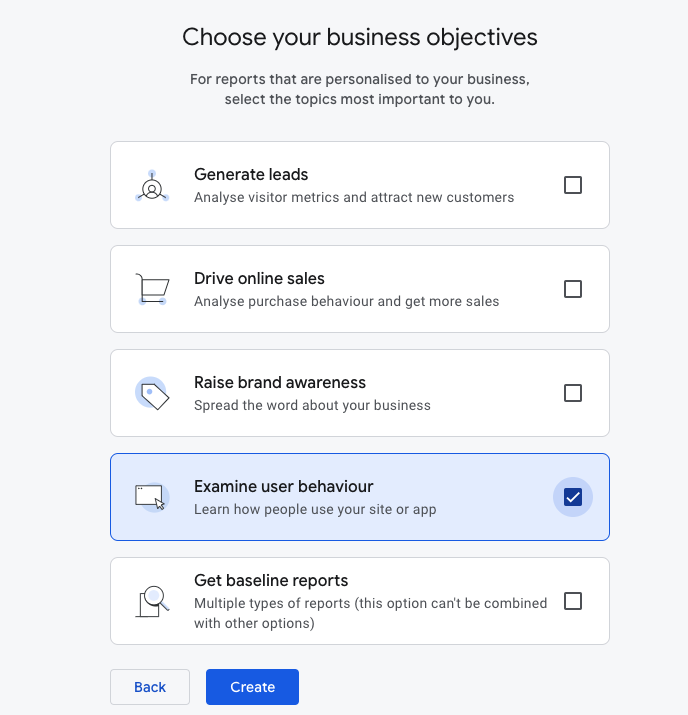
- Choose ‘Examine User Behaviour’. Click ‘Create’.

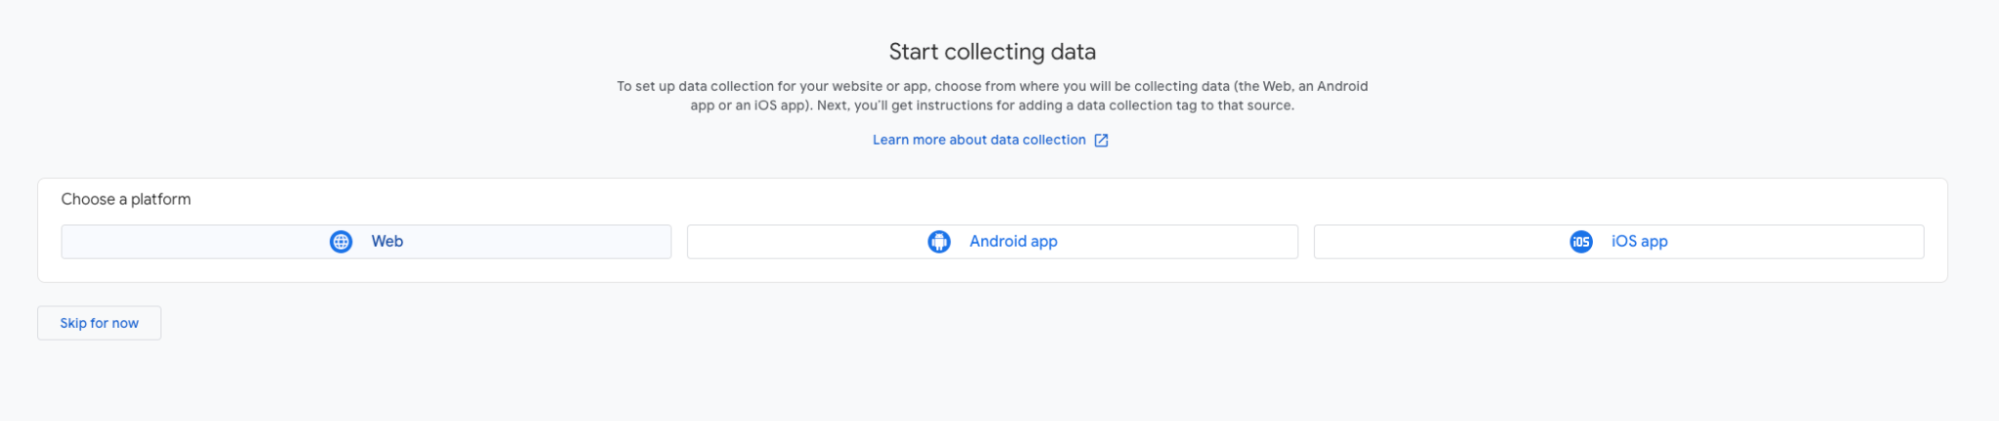
- Click on ‘Web’.
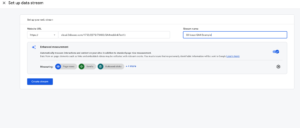
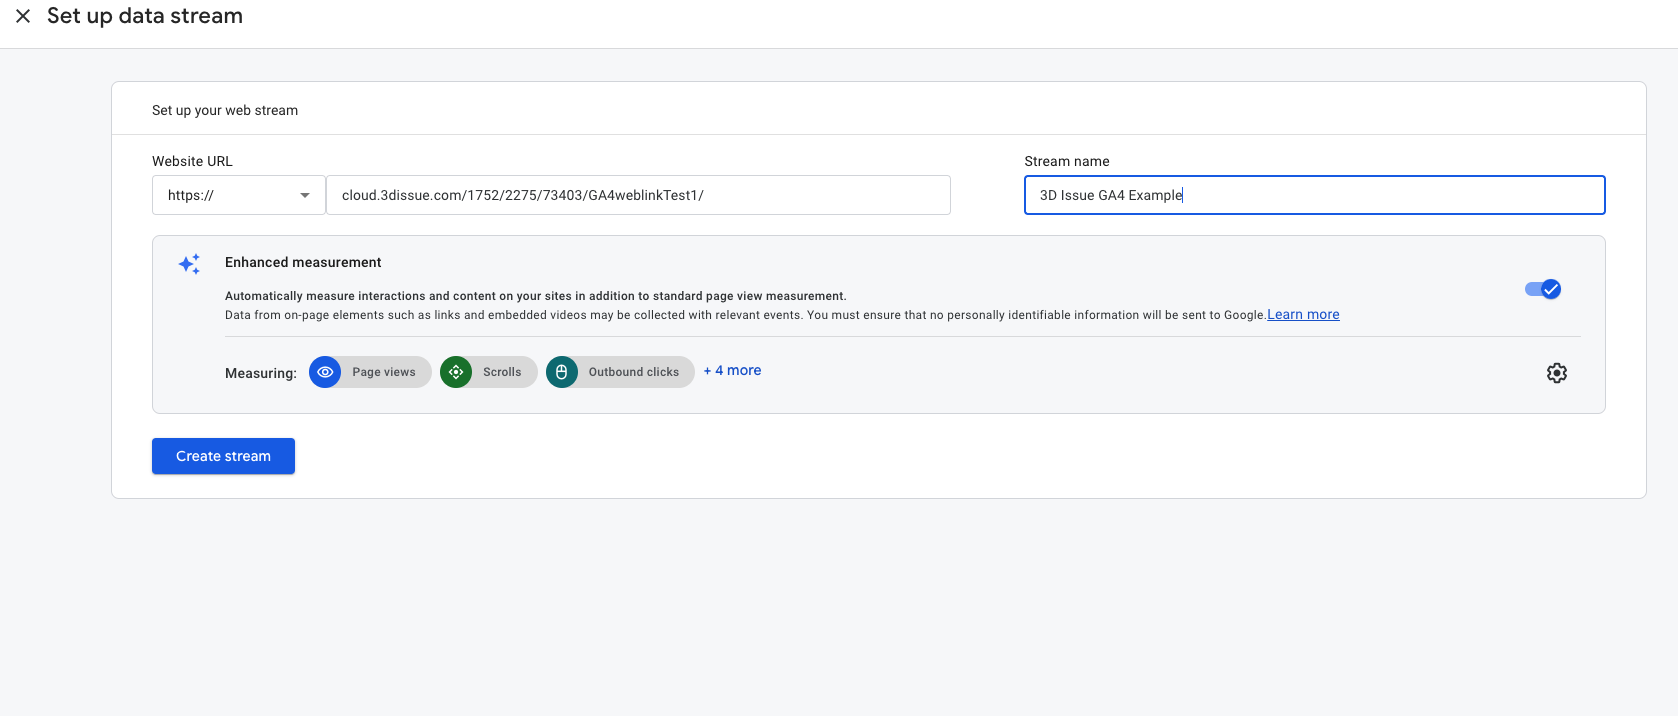
- To set up your data stream, enter the domain or publication URL you will be tracking (this is usually your cName – in this example we are using an individual flipbook publication URL specifically for the purposes of creating this guide) and give the stream a relevant name. Make sure ‘Enhanced measurement’ is enabled. Click ‘Create Stream’.
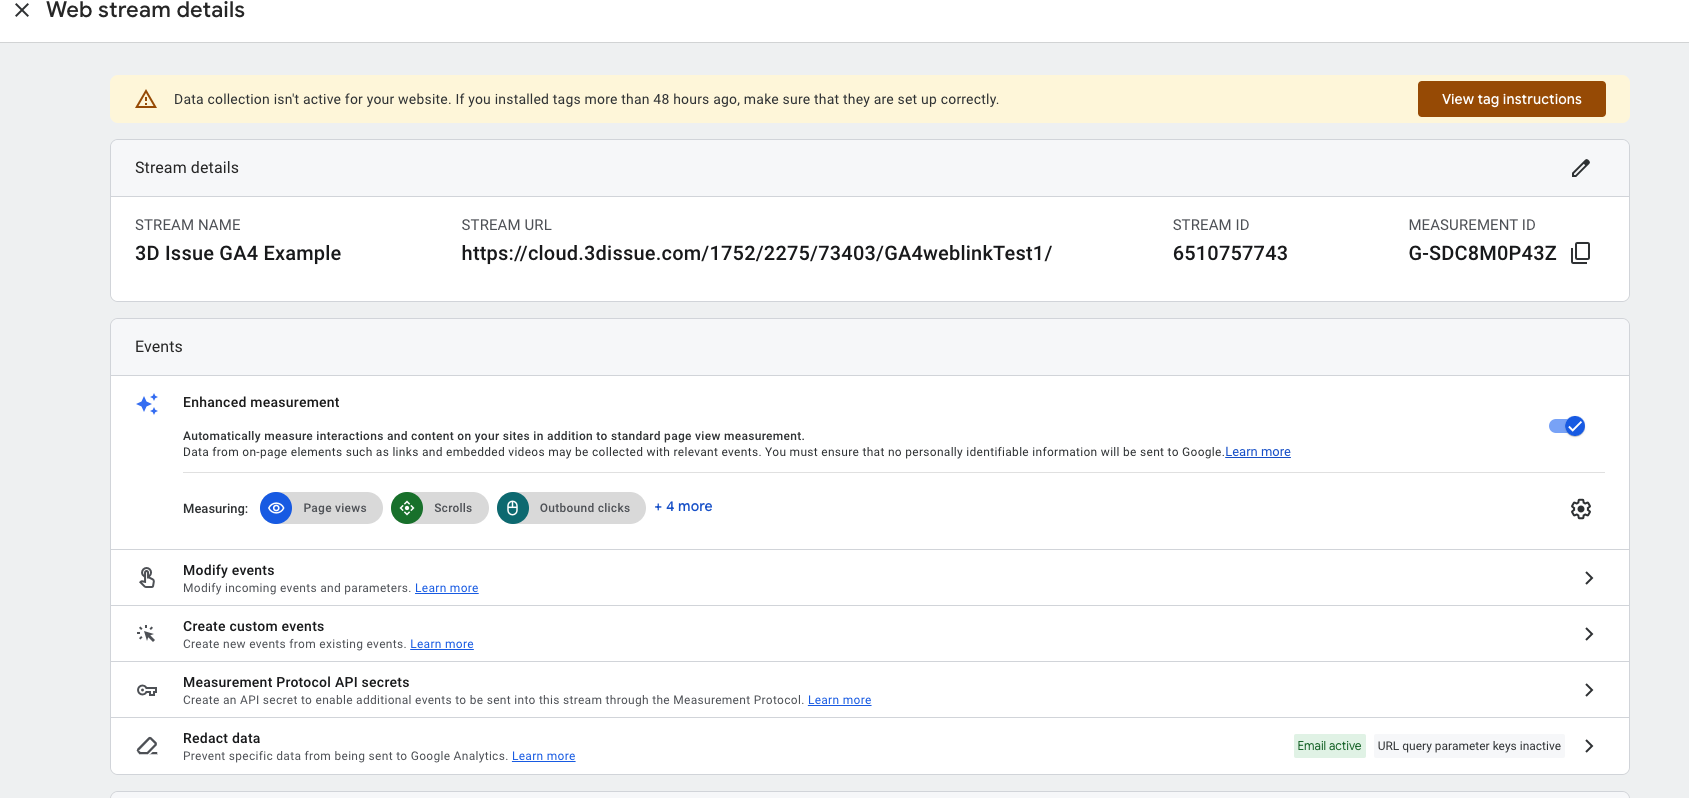
- You will now be presented with your ‘Measurement ID’. This is your individual GA4 tracking ID. Copy this number and click on the ‘X’ to move to the next step.
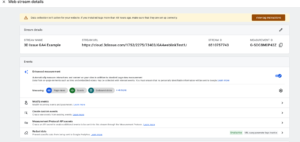
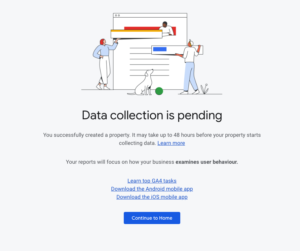
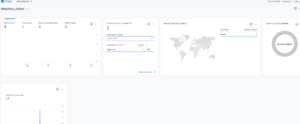
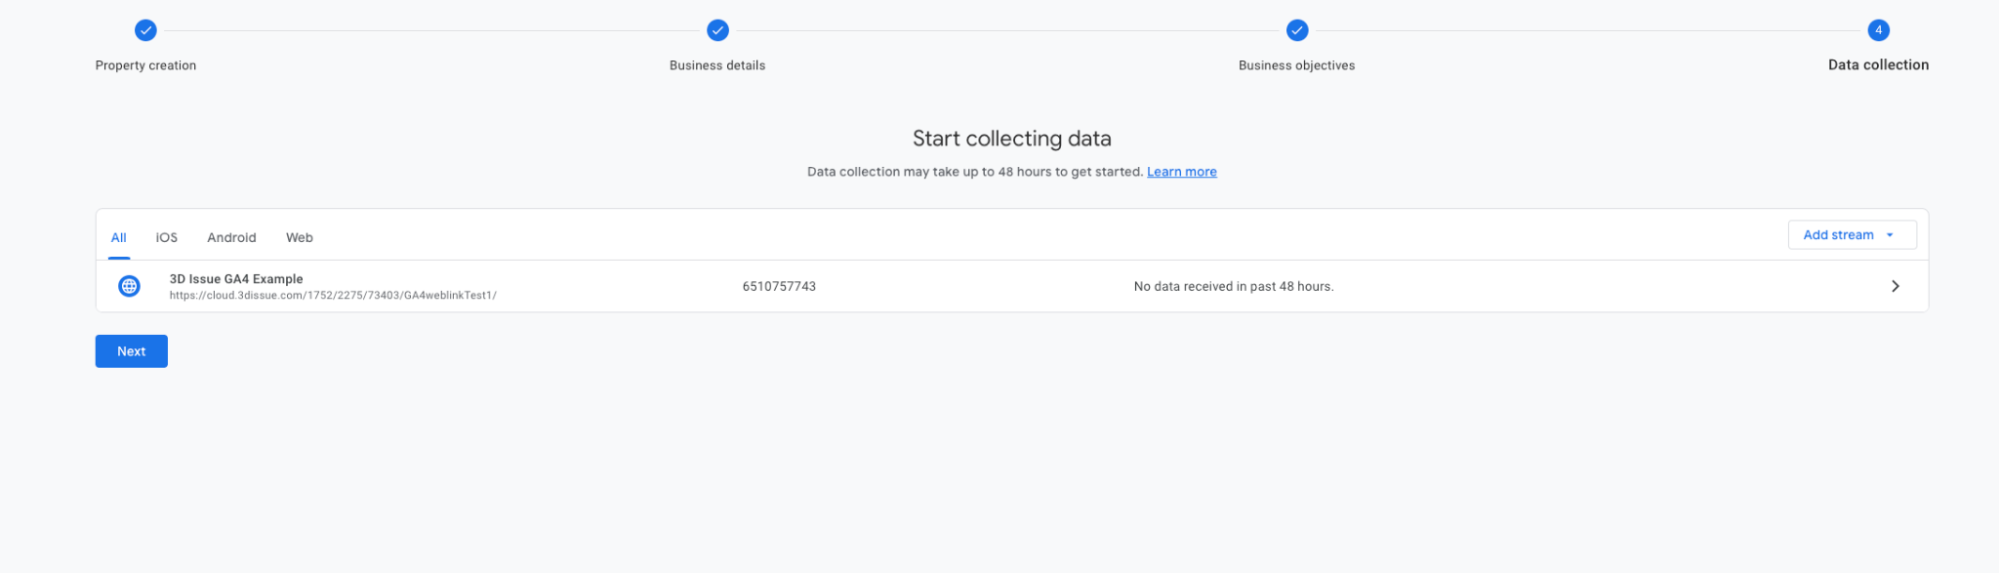
- Review your data stream details. Note that data has not started to be collected at this point. Click ‘Next’.

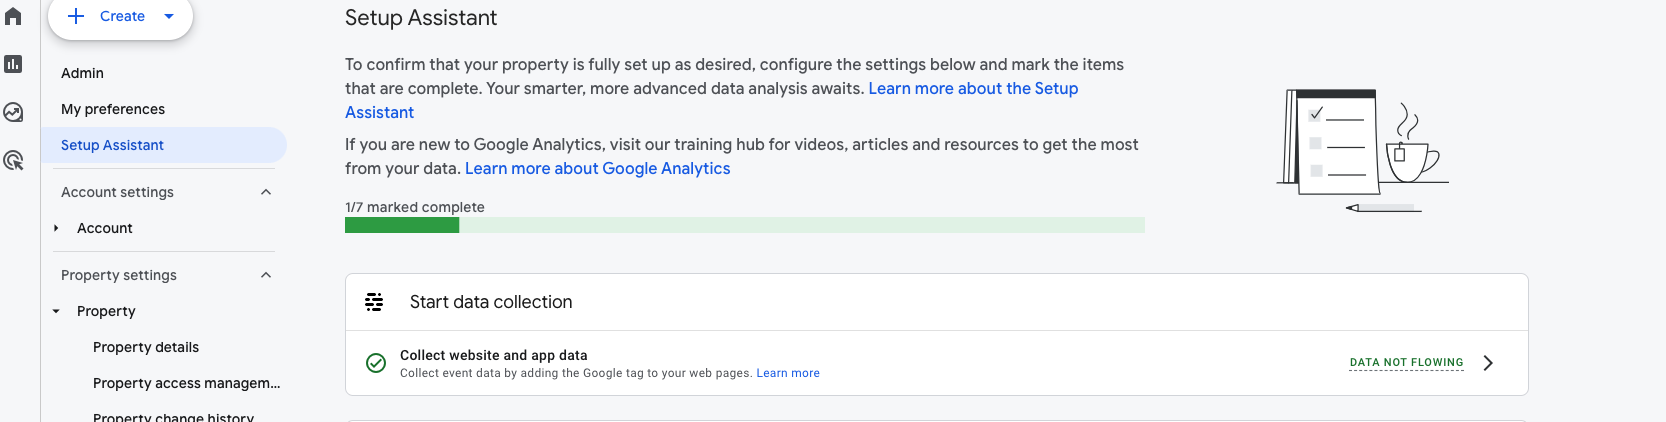
- Click ‘Continue to Home’.
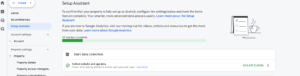
- Under ‘Setup Assistant’ enable ‘Start Data Collection’. This can also be done later after you have published your flipbook.
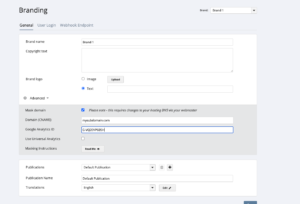
- In the 3D Issue Online Flipbooks dashboard, under ‘Manage -> Branding -> Advanced’ add your CNAME and then add the GA4 tracking ID that you copied in Step 6 in the ‘Google Analytics ID’ field.
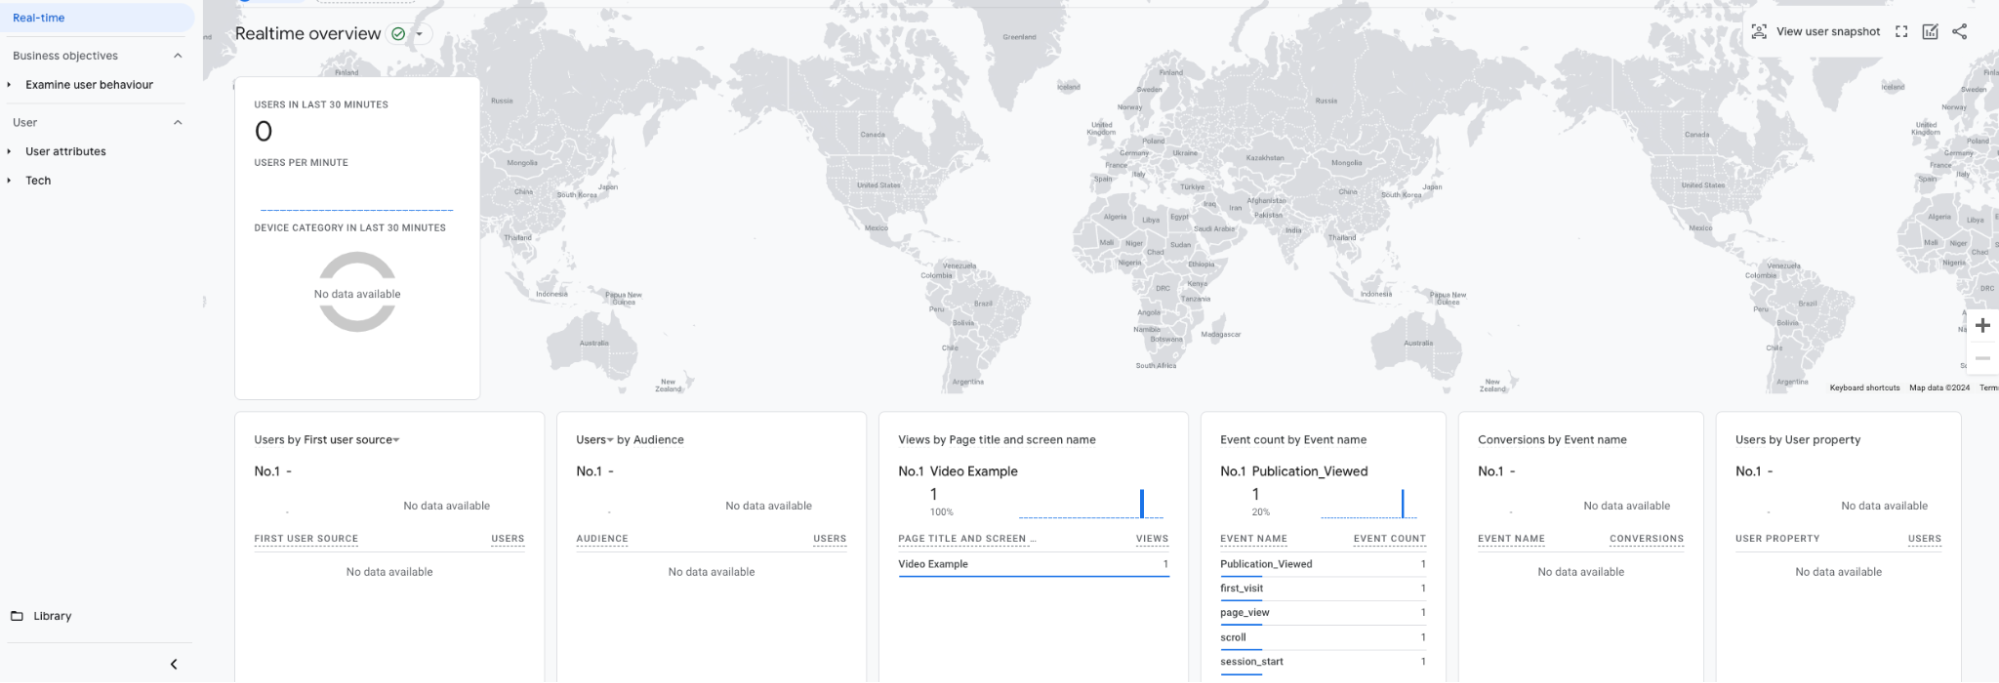
- Next upload and publish your PDF – ensuring that, when prompted, you select the brand that you have added your GA4 tracking ID to. If everything is set up correctly, back in your Google Analytics account you can go to ‘Reports -> Realtime Events’ to see your analytics data being recorded in real time.
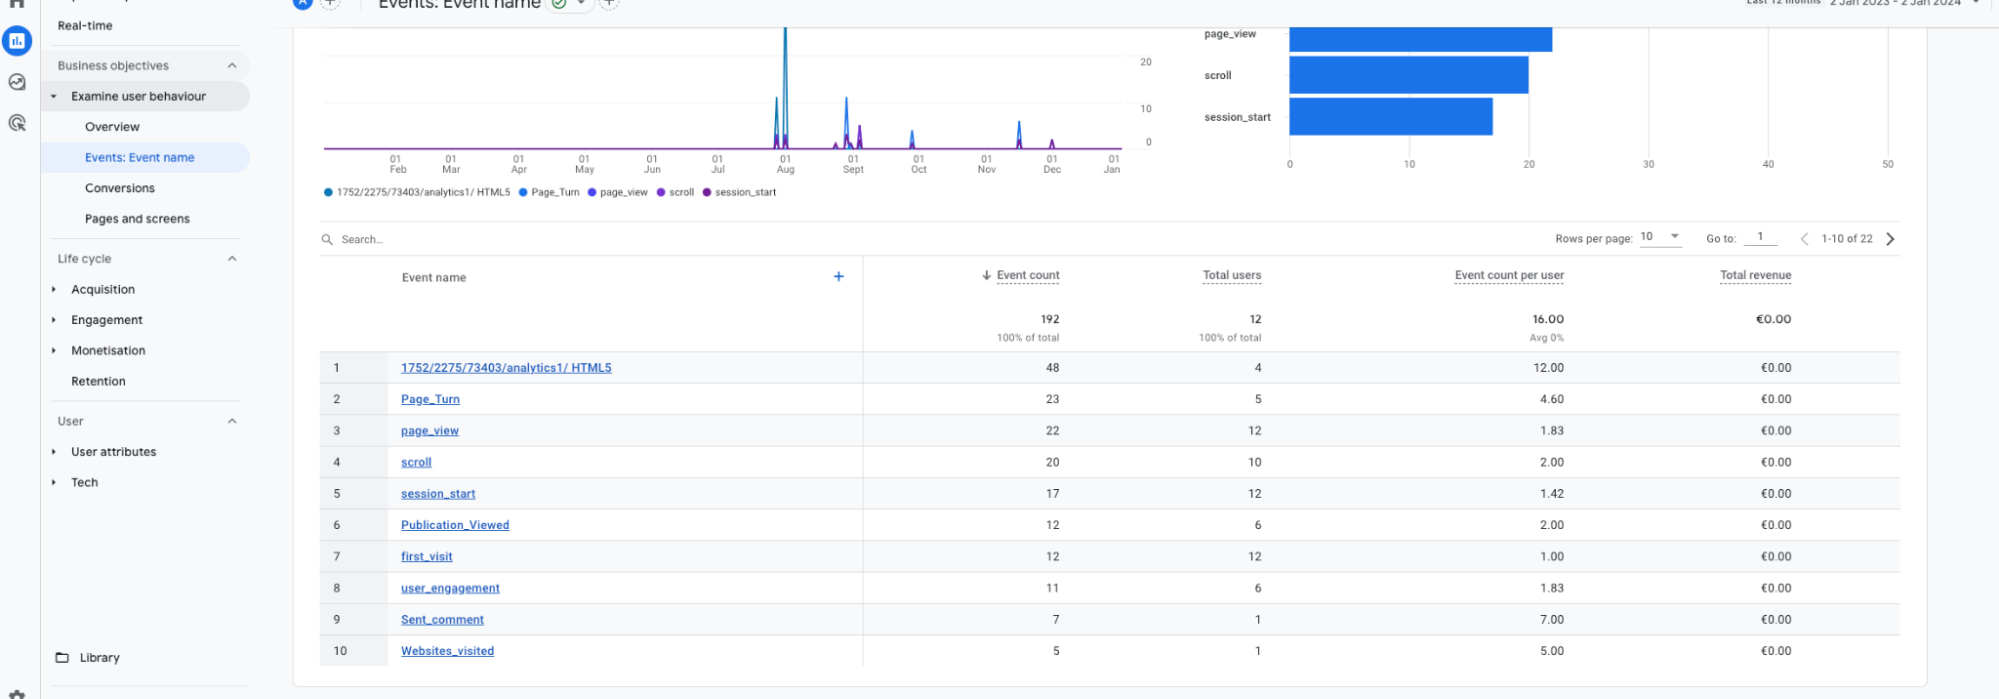
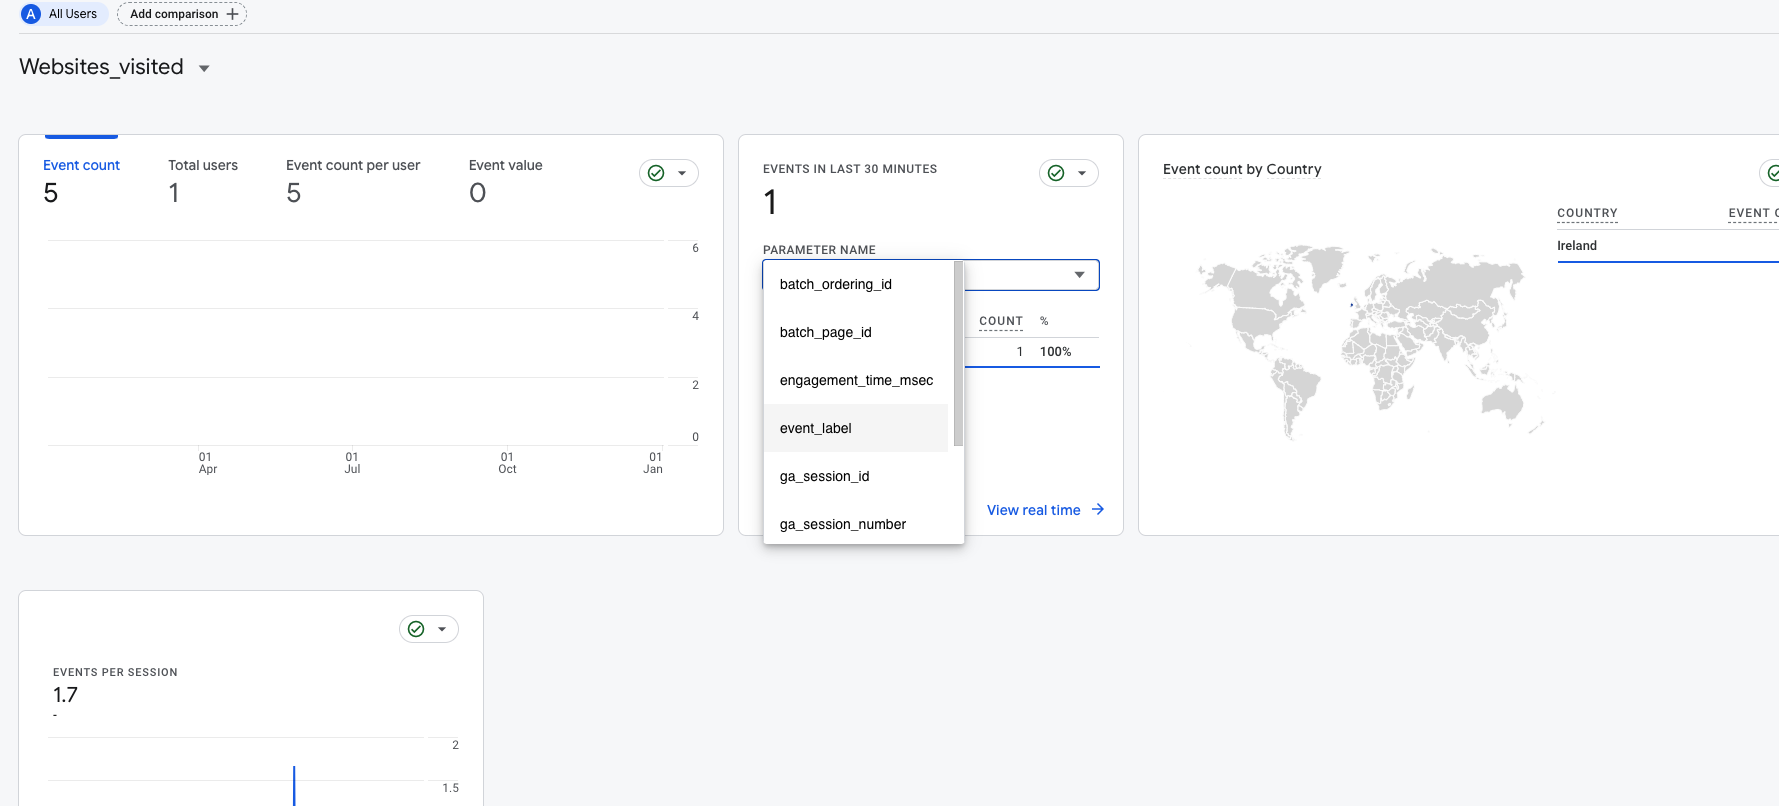
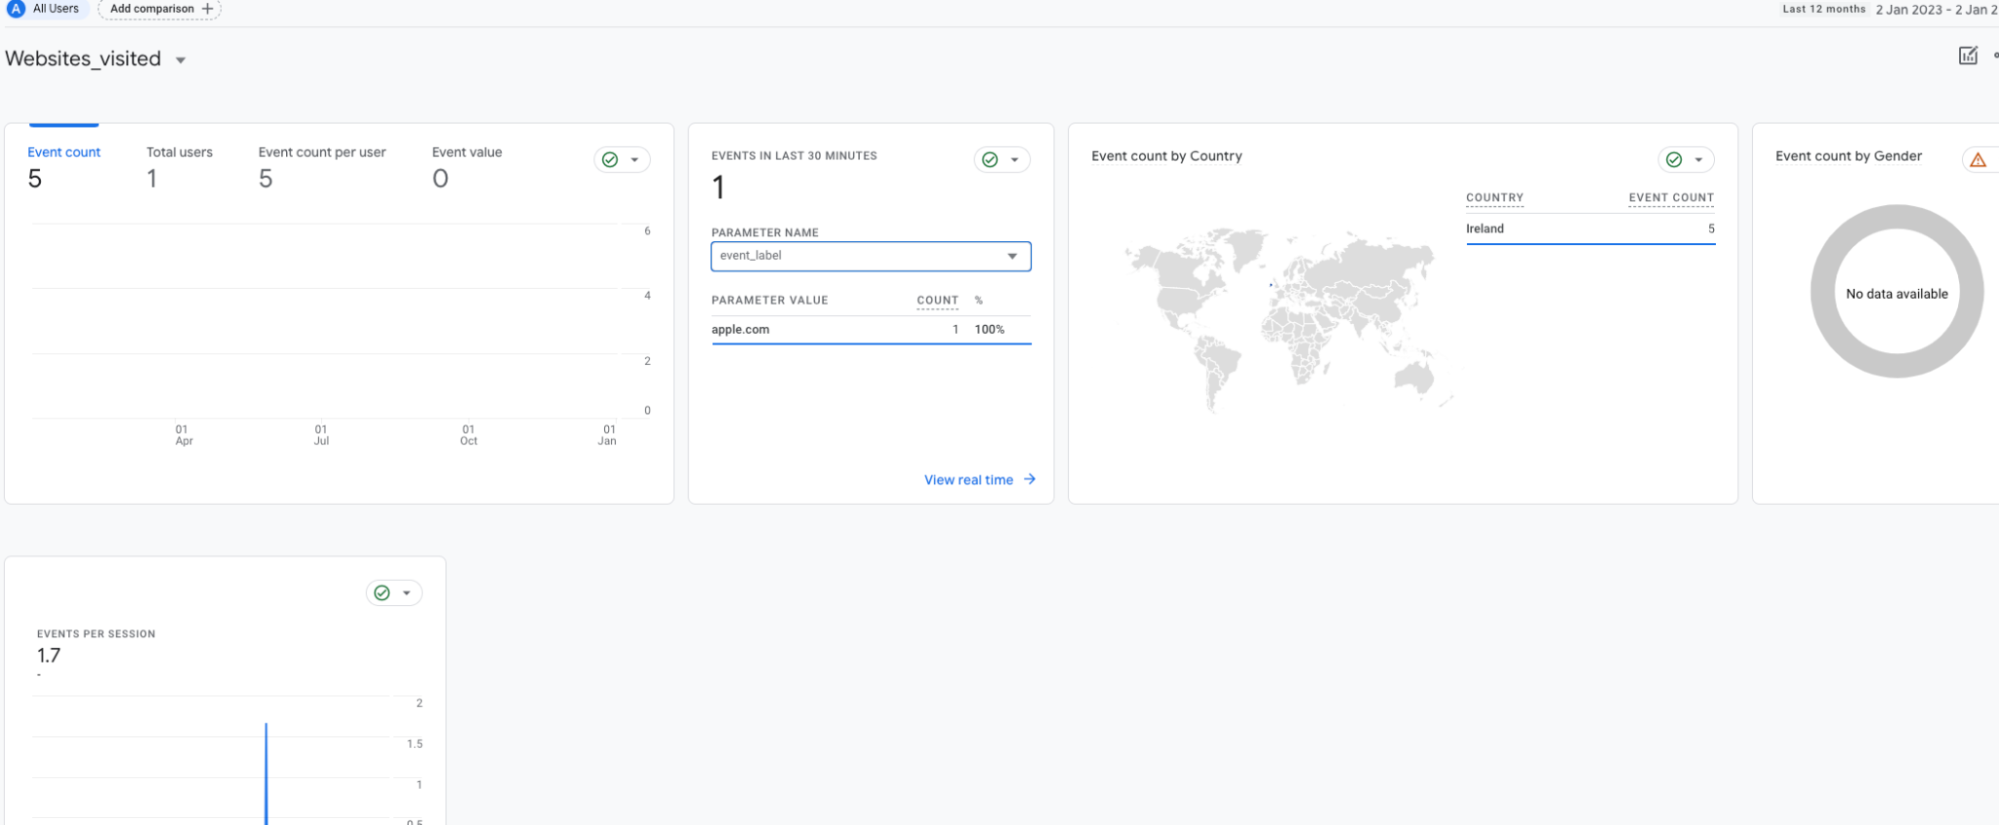
- After 48 hours you should start to see your full results listed by time period. To inspect the granular event data, click on ‘Events: Event name’ on the left hand side of the dashboard. In this example we will look at ‘Websites Visited’ by clicking on number 10 in the list of events above.
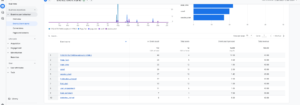
- This will open this event category. By clicking on the ‘Parameter Name’ drop down we can then access the event label.
- This will show us the URL(s) that the user has visited from the flipbook publication.


For more details on how to set up your results dashboard to display specific data sent from your flipbook and to create comparisons and other data representations please visit Google Analytics Help:
https://support.google.com/analytics/?hl=en&sjid=14869599761661097697-EU#topic=14090456