There are two methods of uploading 3D Issue publications (as most users know). By using the included FTP upload module (Upload section of the Output tab), via your own FTP or file transfer solution.
We’re going to cover both here, the first part will be for the built in FTP uploader and the second part of this article will be for the manual uploaders.
Before we get started there are some terms we should make clear;
- Library file – refers to a file called library.xml. This is a file that must be on your server for the apps to work. It’s similar to the older “pageflip-archive.xml” from previous versions of 3D issue, but with some modifications.
- Publication – refers to a collection of issues.
- Issue – a single issue of a publication. For instance a magazine will have a monthly issue!
The Basics
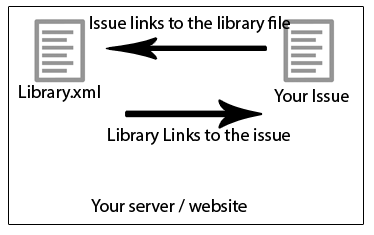
As mentioned before, for the apps to work you need a library file and an issue on your server, as shown above.
This is taken care of by 3D Issue if you are using the upload module. If you choose not to use this you’ll need to make a library file yourself.
Option 1. Uploading with 3D Issue.
This assumes you’ve already gotten your publication ready and are ready to click build and upload!
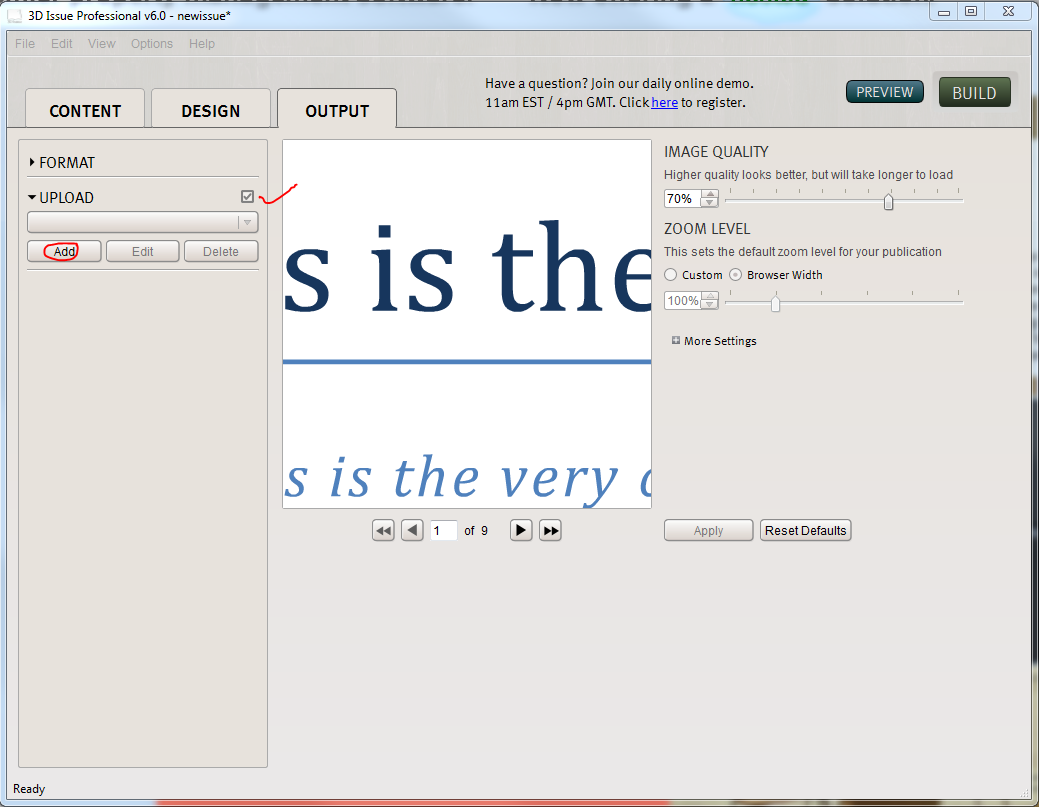
- Start by going to the Output tab of the software. On the left side of the window is the “Upload” Section. Check the box beside it then click the “Add” button.
- In the Window that opens there are a number of options;
- Name – You can add anything here, this is simply for you to identify the upload profile
- FTP server Address – This is the address of your upload server
- Use FTP login Details – Check this if you need to login to the server
- Username + password – the details needed to login to your server (these are obtained from your webmaster or Server admin or Hosting service)
- Advanced – unless specified by your server admin / host you can leave the options in here alone!
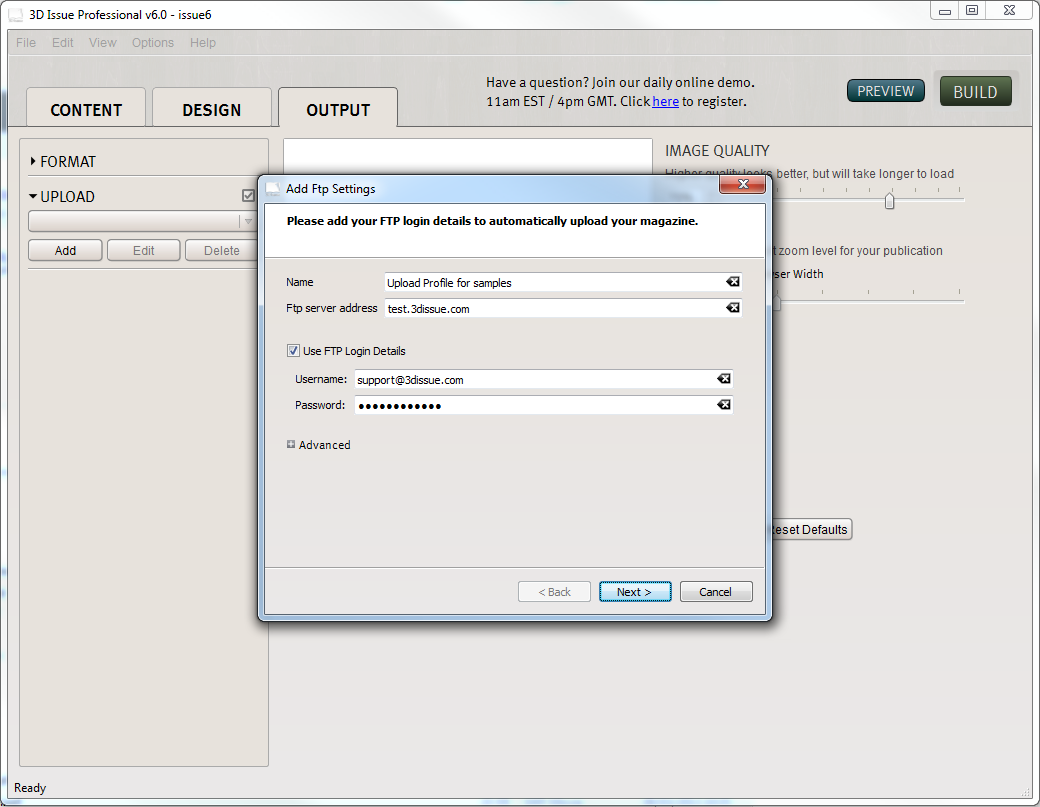
- When you’ve entered your details, click next.
In the new area you can see all the folders in your server etc. Navigate to the folder you wish to use for your publications and double click it to enter the folder. This is important as the software uses the folder you are currently in, rather than the one selected.
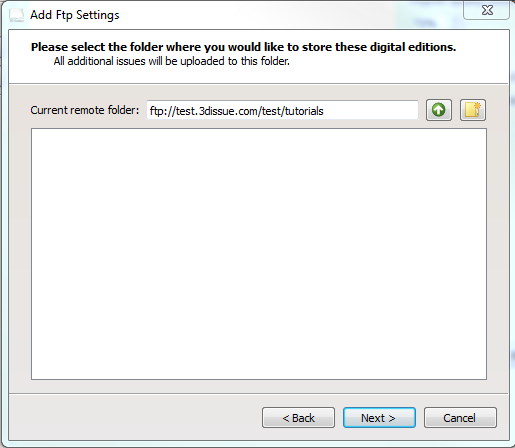
- Click Next.
- In the next page it will look the exact same. This is the location of the Library file – it’s a simple xml file that tells the software about past editions. It also is used for the 3D Issue Apps on Android, iOS, Windows, Mac and Facebook. We recommend taking the default but you can change this to suit your needs.
- Click next when done.
- In the final page of the FTP Wizard you’ll see two white text boxes. These are editable.
If you have used an IP address for your FTP server, or have a hidden folder such as wwwroot or public_html you’ll need to edit these.
In our example in the screenshot below we’ve edited out “test/” in the Issue http address, and highlighted the change in the library address so you can see what we did. “test” is a hidden folder so we have to remove it as it shouldn’t show in our web address. Both addresses should be the same.
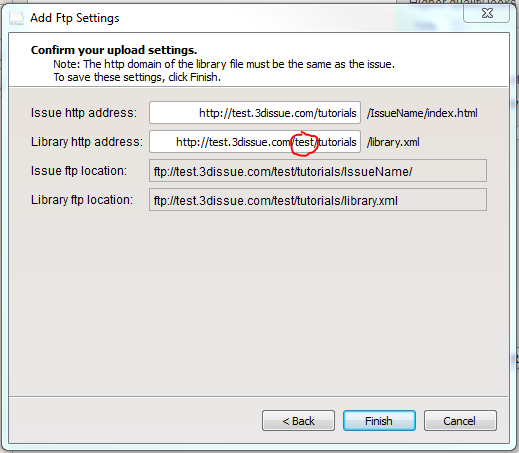
Once done click finish. And if you are ready to upload click build!
Option 2. Uploading Manually.
Read through these instructions before ever clicking build in 3D issue if you are intending on manually uploading. The reason for this is to ensure none of your publication files get mixed up or damaged.
To manually set up the Version 6 library file:
- Decide where you will upload the library file, this location should be persistent and not need changing often. We’ll create this file later when we have a version 6 publication to upload.
The URL for the library file must be similar to; http://your-website.com/blabla/library.xml
If the URL does not contain http or library.xml it will be considered invalid. - When you build the publication in 3D Issue, the software will ask if you would like to specify a library location. The address you enter here should be the exact address of the library.xml. This embeds the location of the library into the publication so it will always look in that location.
- Once you have built the publication you will probably upload it to your server. The address of the new publication needs to be added to the library.xml and uploaded to the location you specified earlier.
Attached below is an example library file.
- Simply open the library file in a text editor such as notepad, and edit the library title line to suit your needs and edit the publication line to match your own. Repeat the single publication line to add further publications.
So with two issues the library will look like this:
<?xml version="1.0" encoding="UTF-8" standalone="yes"?>
<menu>
    <item sTitle="PUBLICATION TITLE" sURL="" sDate=""><item sTitle="ISSUE 1" sURL="http://www.3dissue.com/magazine-samples/3dissuedemo/index.html" sDate="2012-12-13"/>
        <item sTitle="ISSUE 2" sURL="http://www.3dissue.com/magazine-samples/google/index.html" sDate="2012-12-16"/>
    </item>
</menu>
If you were to have two differently named publications in the same library it would look like this:
<?xml version="1.0" encoding="UTF-8" standalone="yes"?> <menu> <item sTitle="PUBLICATION TITLE 111" sURL="" sDate=""><item sTitle="ISSUE 1" sURL="http://www.3dissue.com/magazine-samples/3dissuedemo/index.html" sDate="2012-12-13"/> <item sTitle="ISSUE 2" sURL="http://www.3dissue.com/magazine-samples/google/index.html" sDate="2012-12-16"/></item><item sTitle="PUBLICATION TITLE 222" sURL="" sDate=""> <item sTitle="ISSUE 1" sURL="http://www.3dissue.com/magazine-samples/3dissuedemo/index.html" sDate="2012-12-13"/> <item sTitle="ISSUE 2" sURL="http://www.3dissue.com/magazine-samples/google/index.html" sDate="2012-12-16"/> </item> </menu> - Once you have made your changes to the library file upload it to the location specified earlier.
- You can test if the library file is working correctly by attempting to download the desktop reader version or download the publication from the iOS or Android app.
That wasn’t so bad, was it?
If you’ve followed these instructions perfectly you should now be able to download your publication to the app on your device. Simply load the publication online. When prompted click view and you’ll be brought to the app store to install the app. Once the app opens you’ll be asked to go back to the browser can click refresh then view again.
This will only happen the first time the app is used. Each time after, the app will open and download the publication automatically.
If things go wrong, go back and follow these steps. Remember that most of the time the problem is caused by a small error along the way. Feel free to email us at support@3dissue.com to diagnose any issues you are having. Providing links and detailed descriptions of what is happening will help us help you!