Google Tag Manager support was added to Flipbooks Desktop in version 9.3. Tag Manager enables a whole new slew of capabilities and ways of customising your Flipbooks.
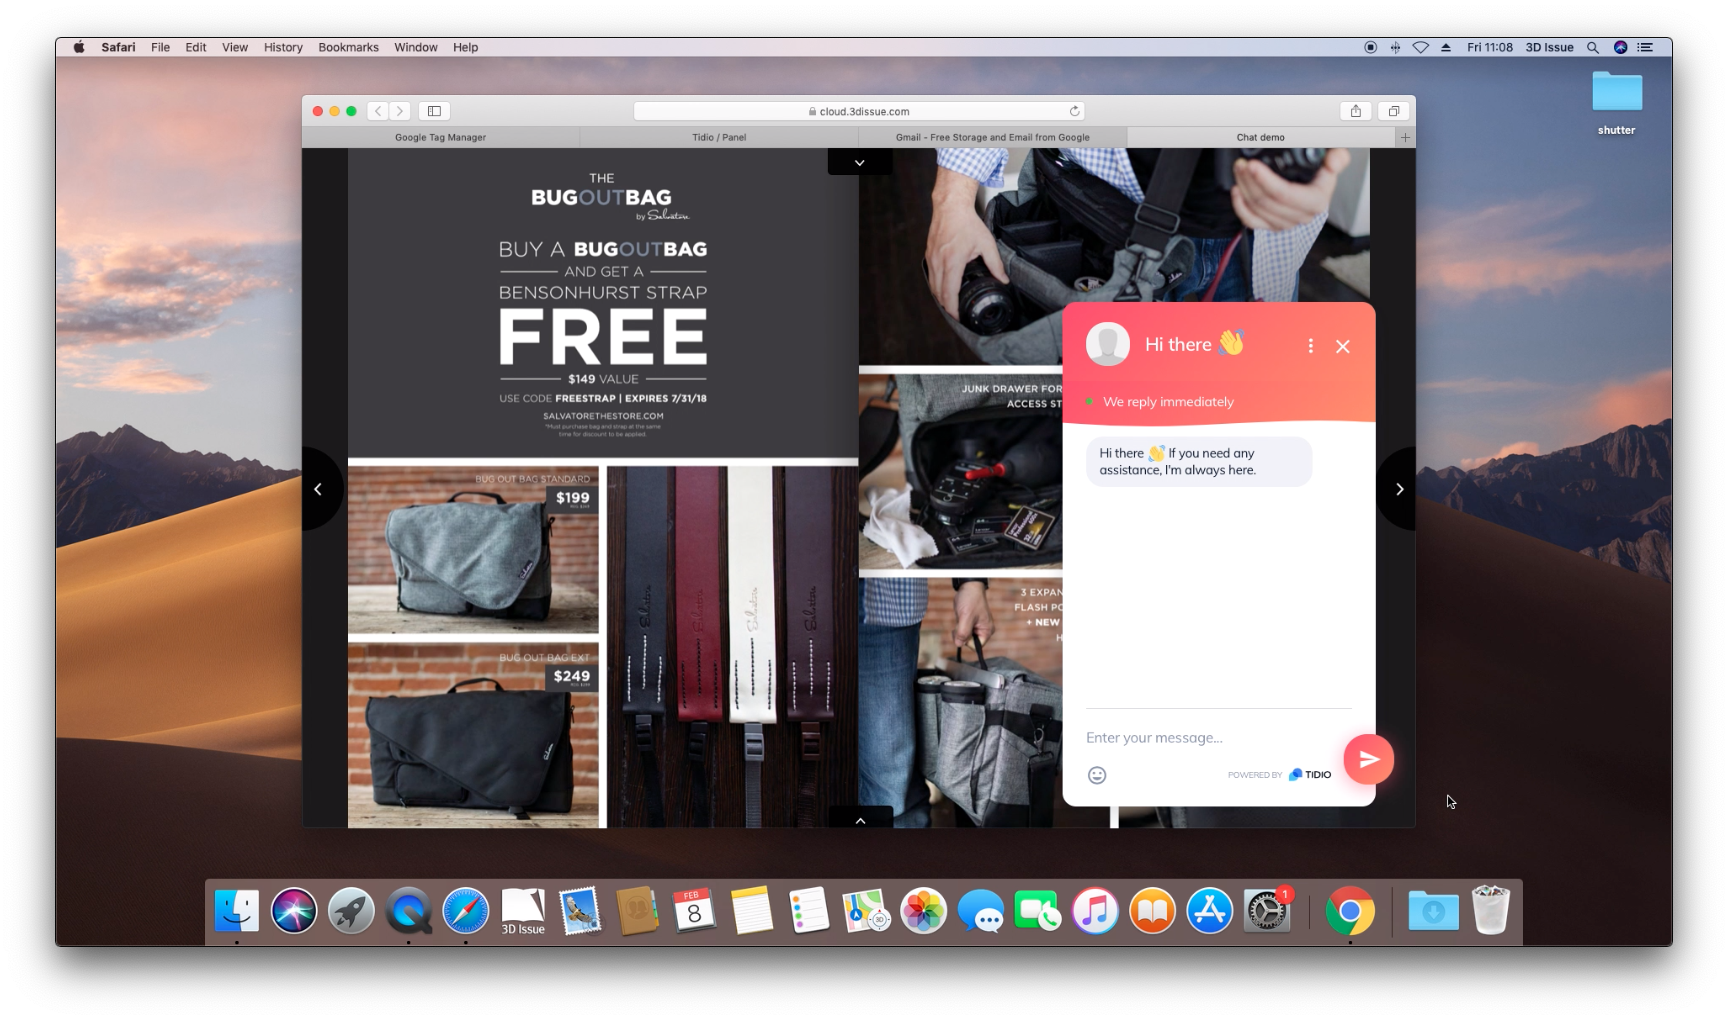
One use for Tag Manager, that may be popular with e-commerce publications is the ability to add live chat to your publications by including your chat solution’s code snippet.
This tutorial will show you how to add Live chat by using Tidio. Tidio offer a free license for small teams and is free forever. Let’s get started…
1. Create & setup accounts.
We’ll start by creating and setting up our accounts on Tag Manager and Tidio.
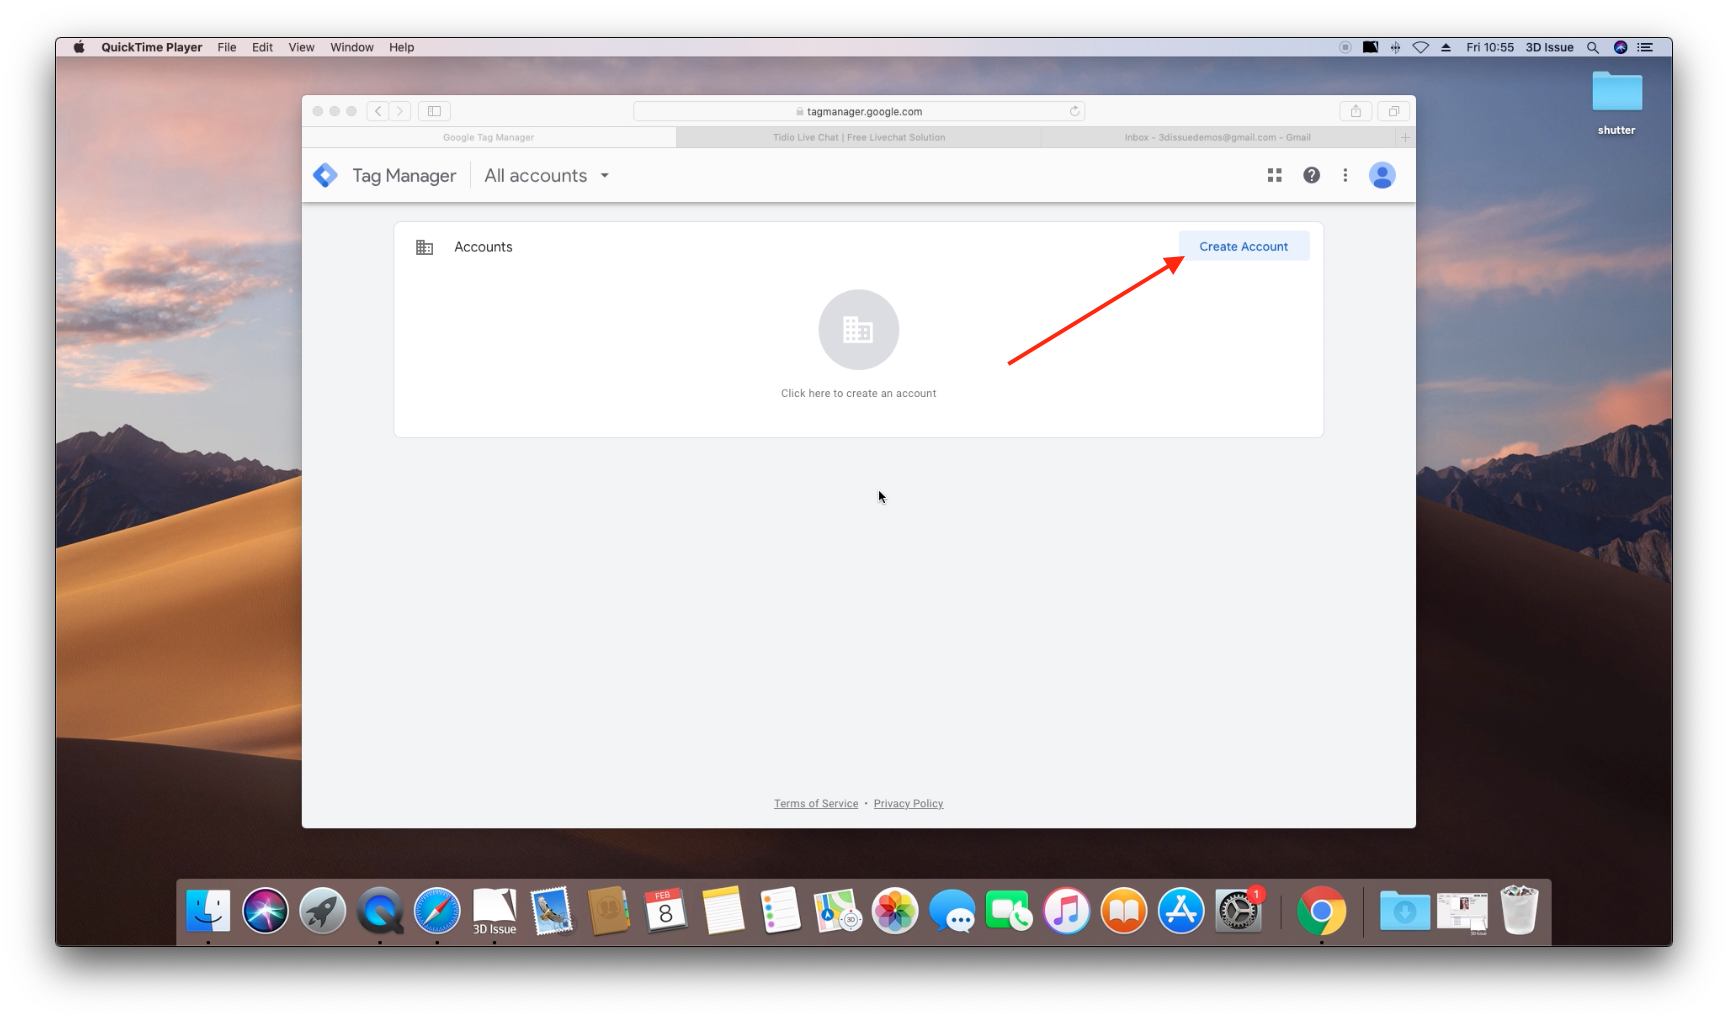
- Head over to Google Tag Manager and sign in with your Google Account to start creating an Account.
- When signed in, you’ll need to create your first Tag Manager account. Click Create Account
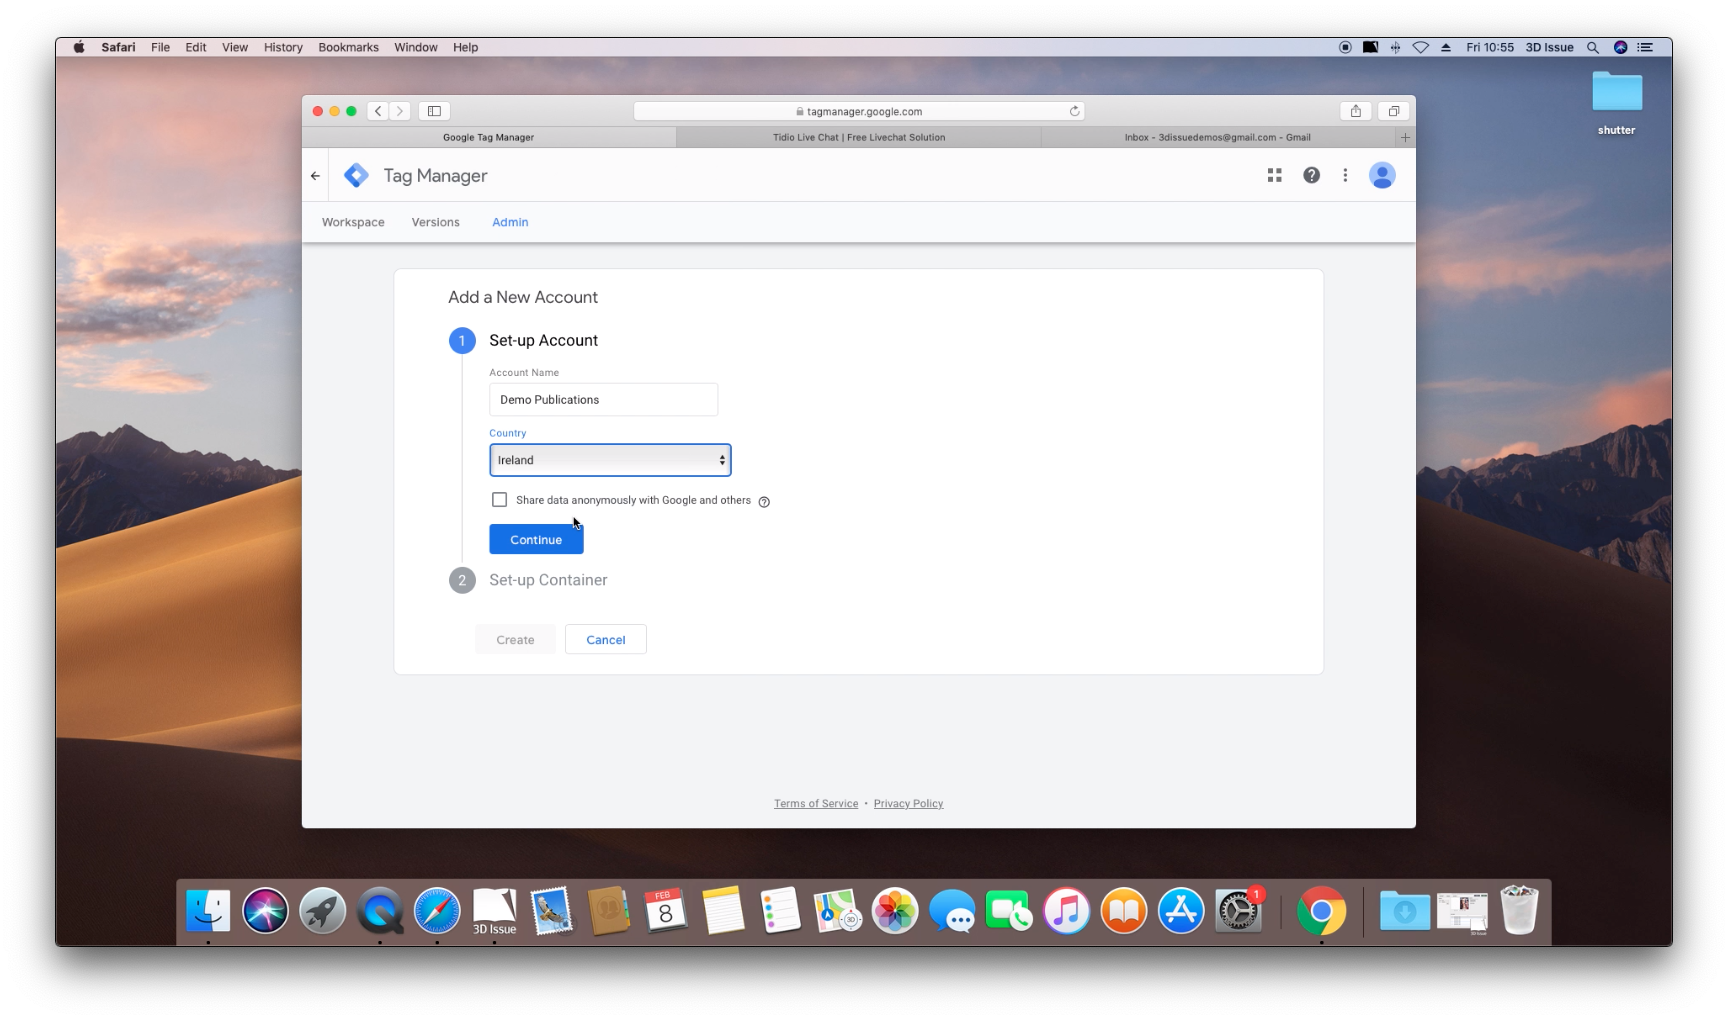
- On the next page give your new Account a name, this can be anything. Select your Country and click Continue
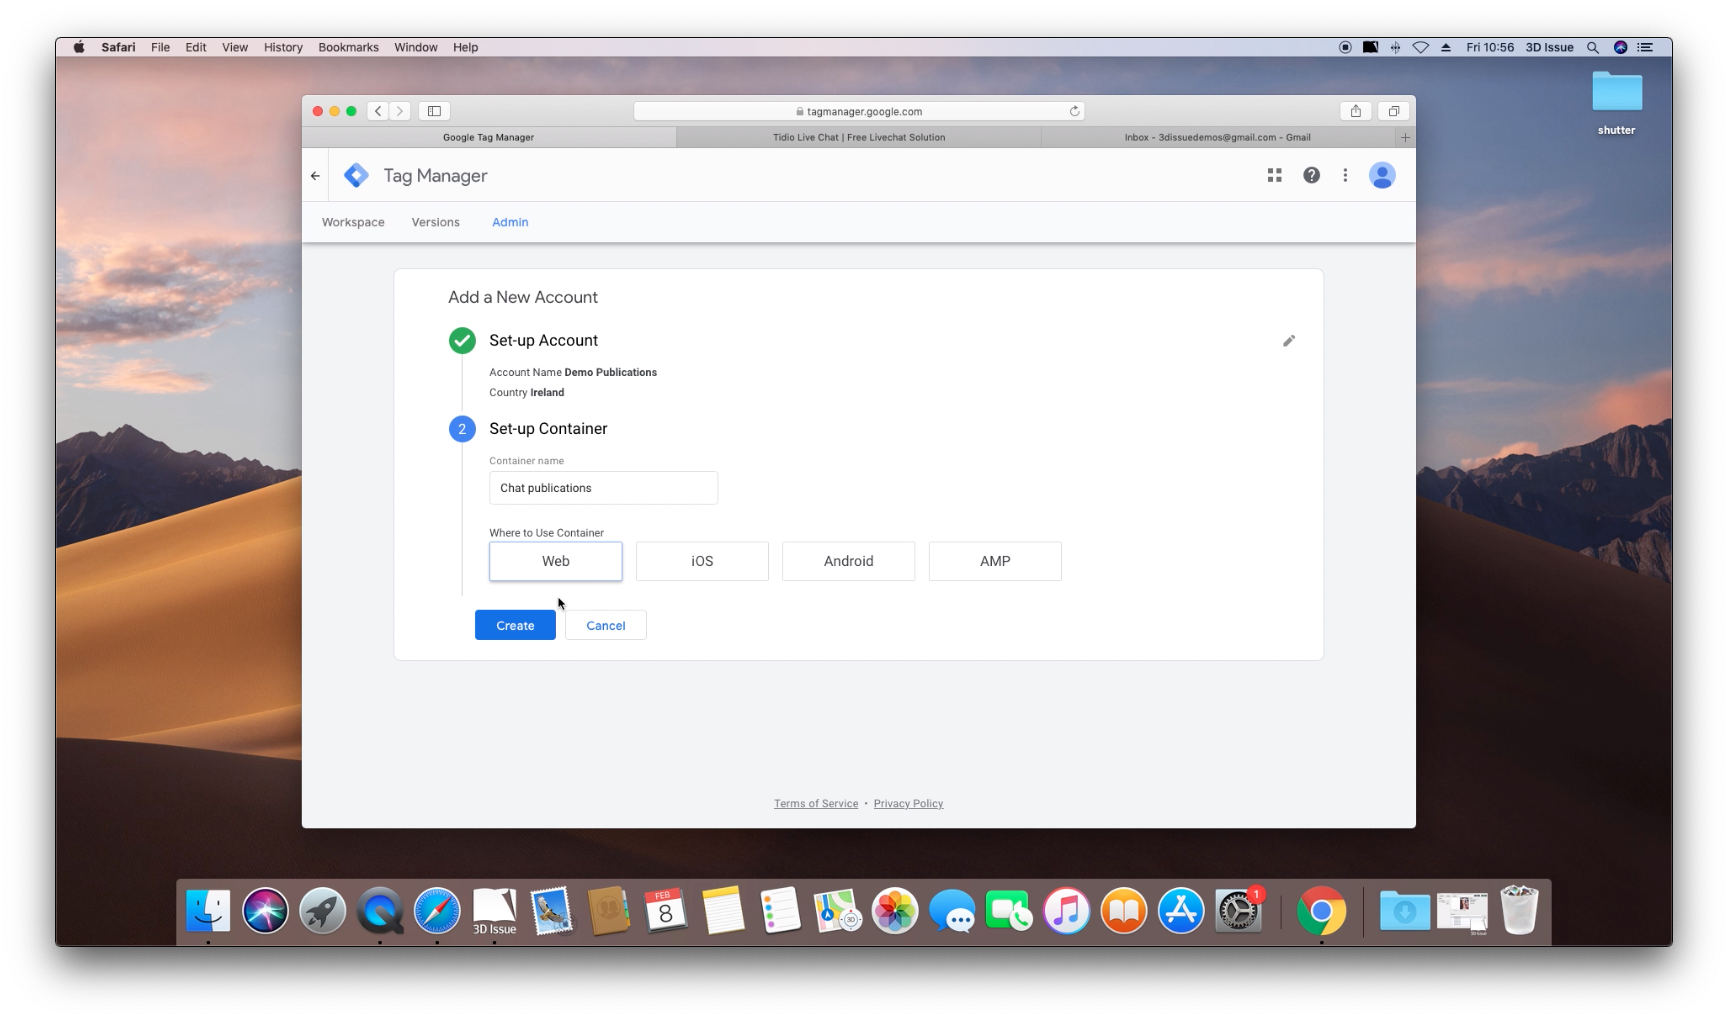
- Then give your Container a name. Containers represent your website, pages, apps etc. We’re going to use the container for the web, so select that too.
- Agree to the terms & privacy policy if prompted.
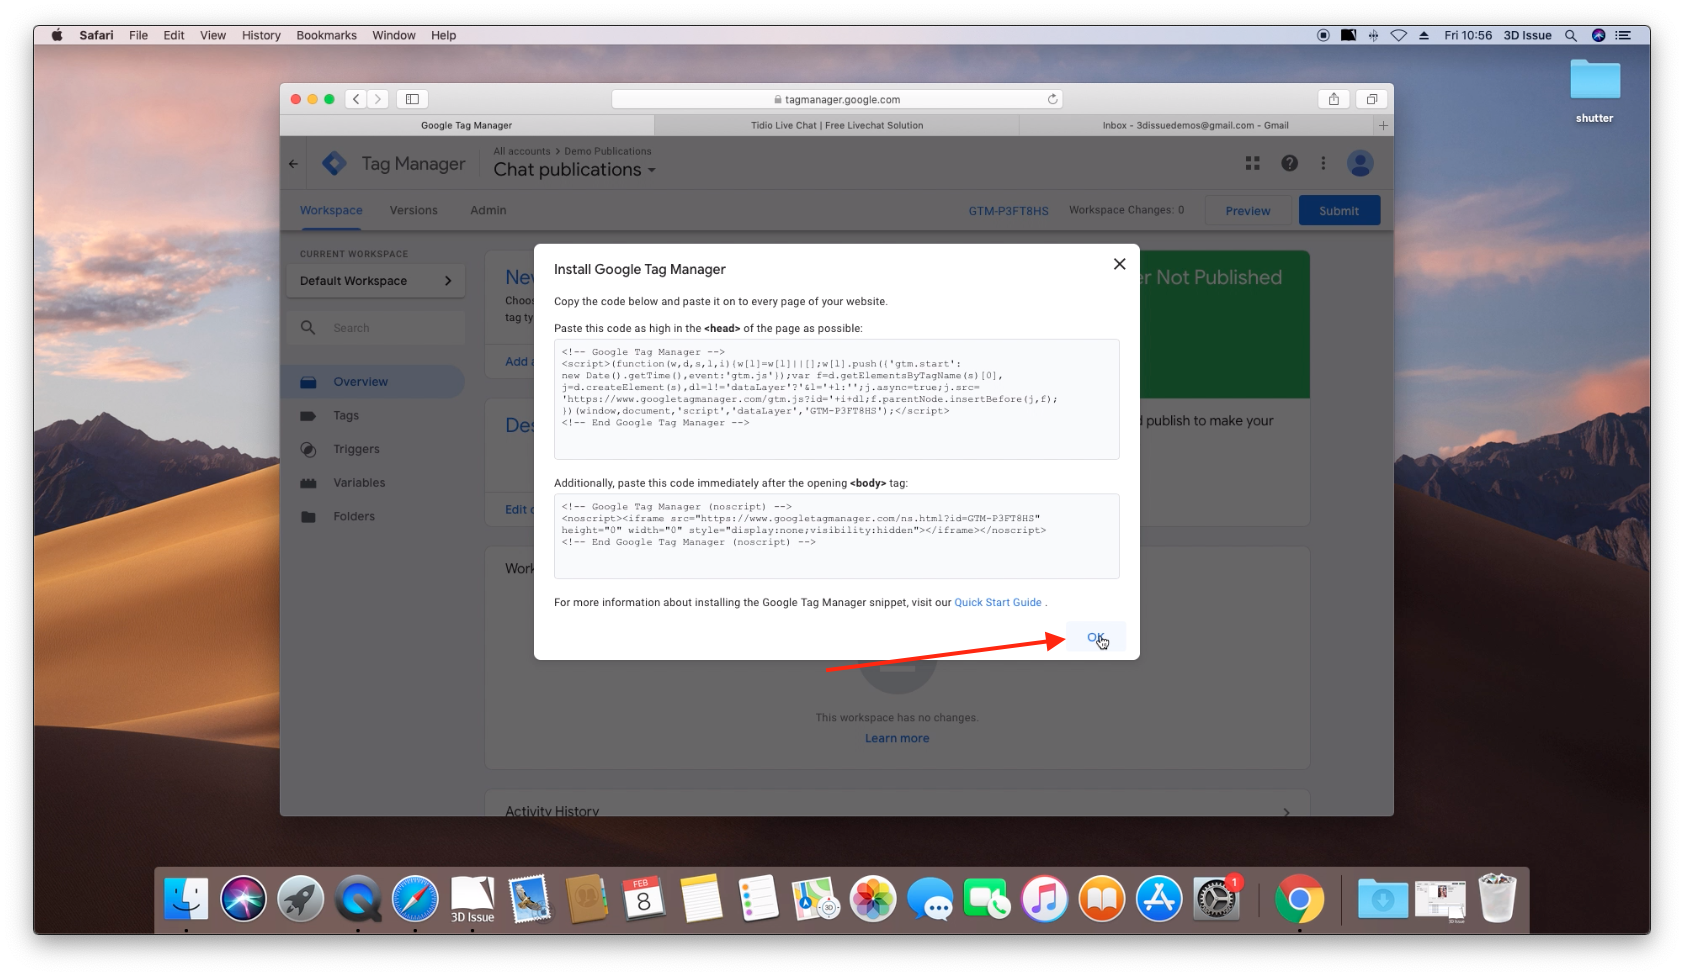
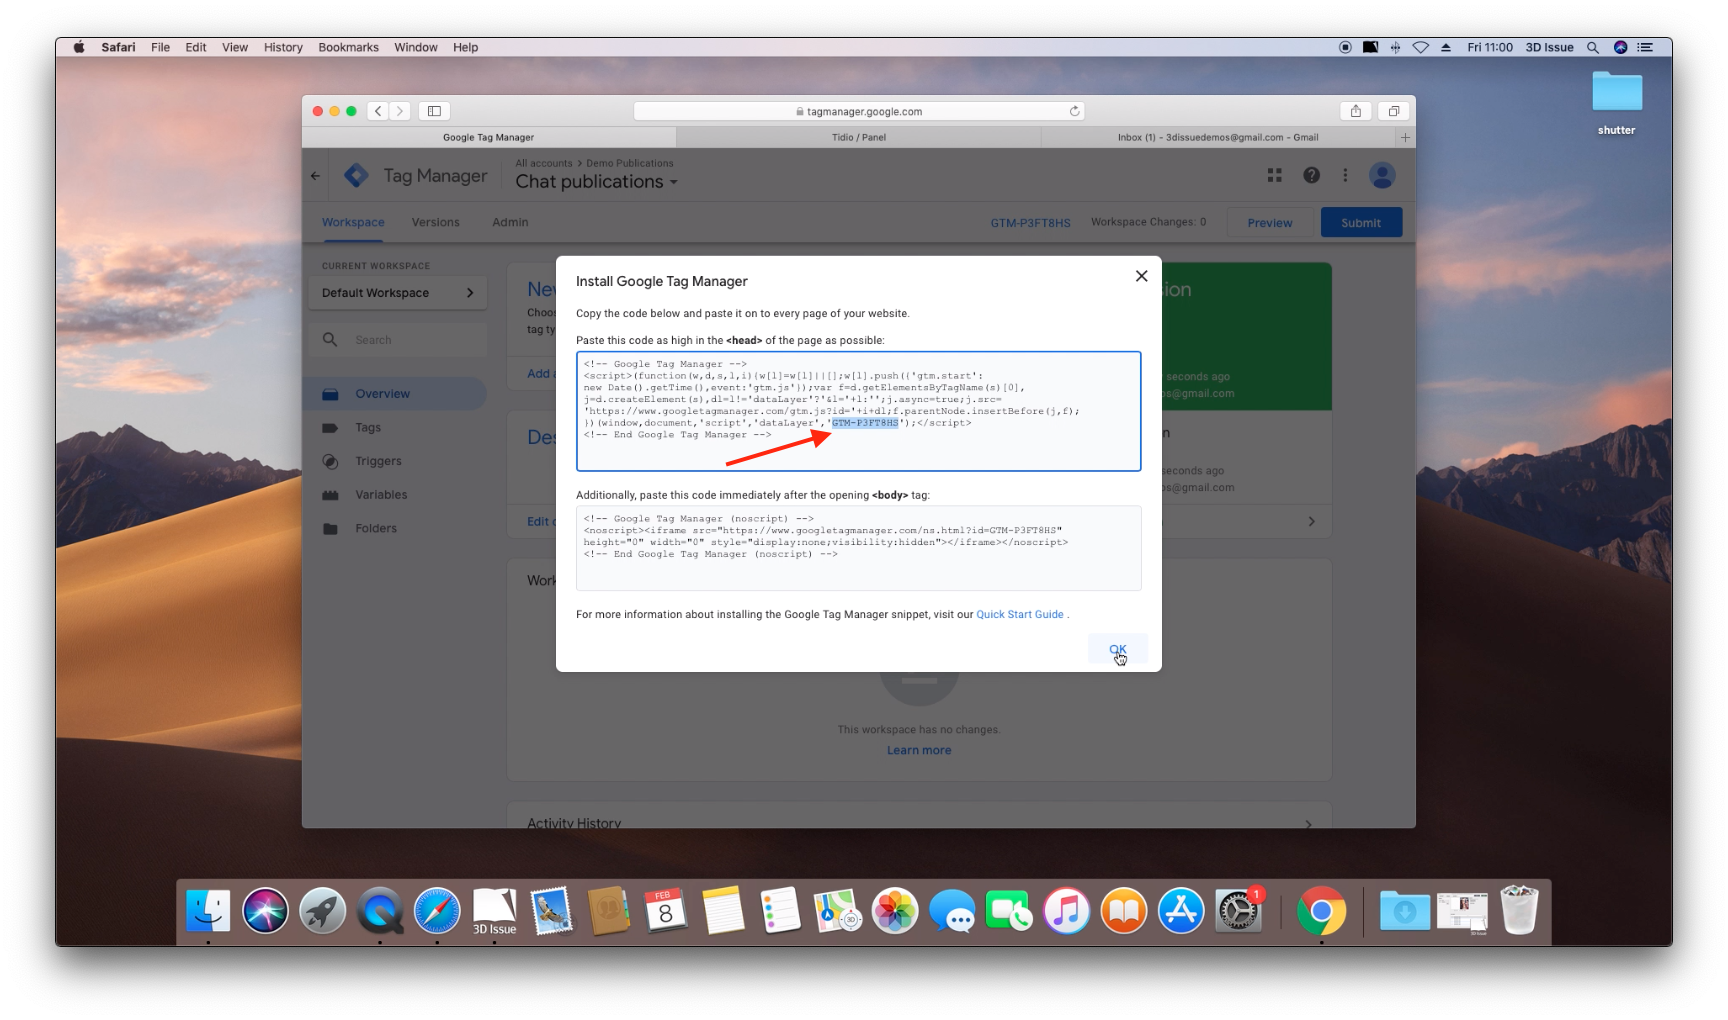
- You’ll be brought into your new Tag Manager workspace, and will likely be prompted to Install Google Tag Manager, just click OK
- Now we’re going to create our account on Tidio.
- Head over to Tidio and click Try it out to start making an account.
- On the register page fill in your details and click Register.
- After registering you’ll be brought into a setup wizard. Just follow the steps choosing your preferences etc.
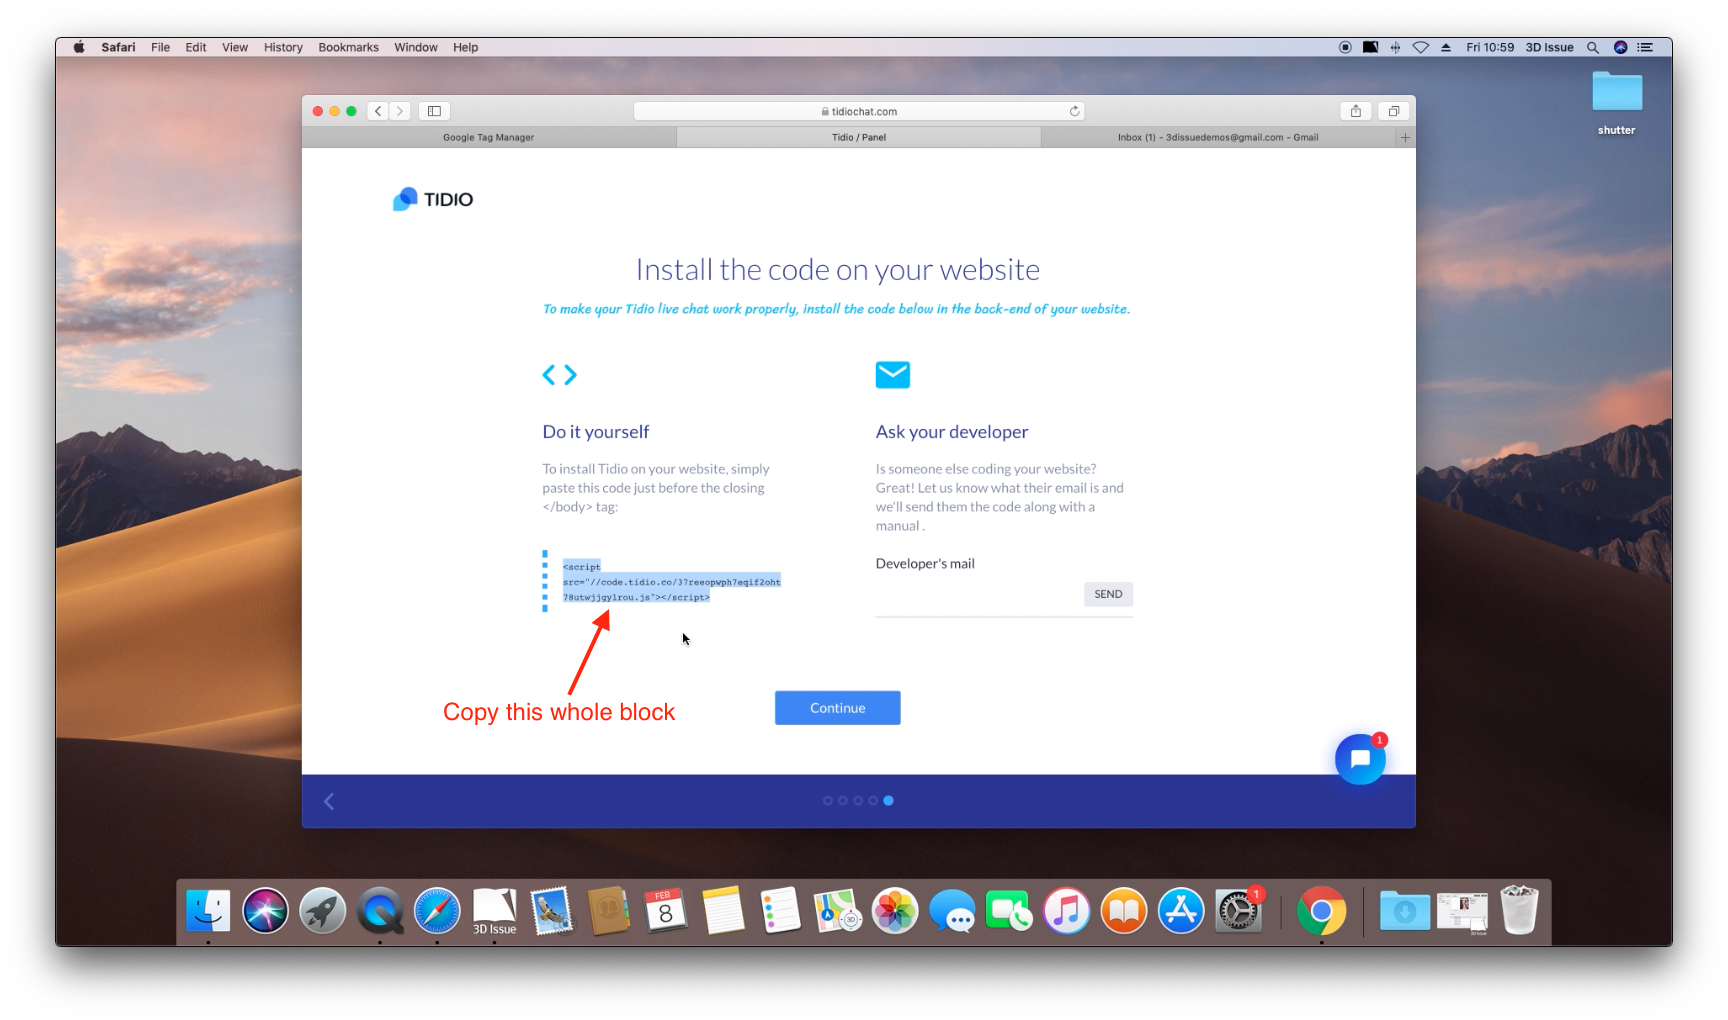
- You’ll eventually reach this page Install the code on your website.
Under Do it yourself copy the script tag.
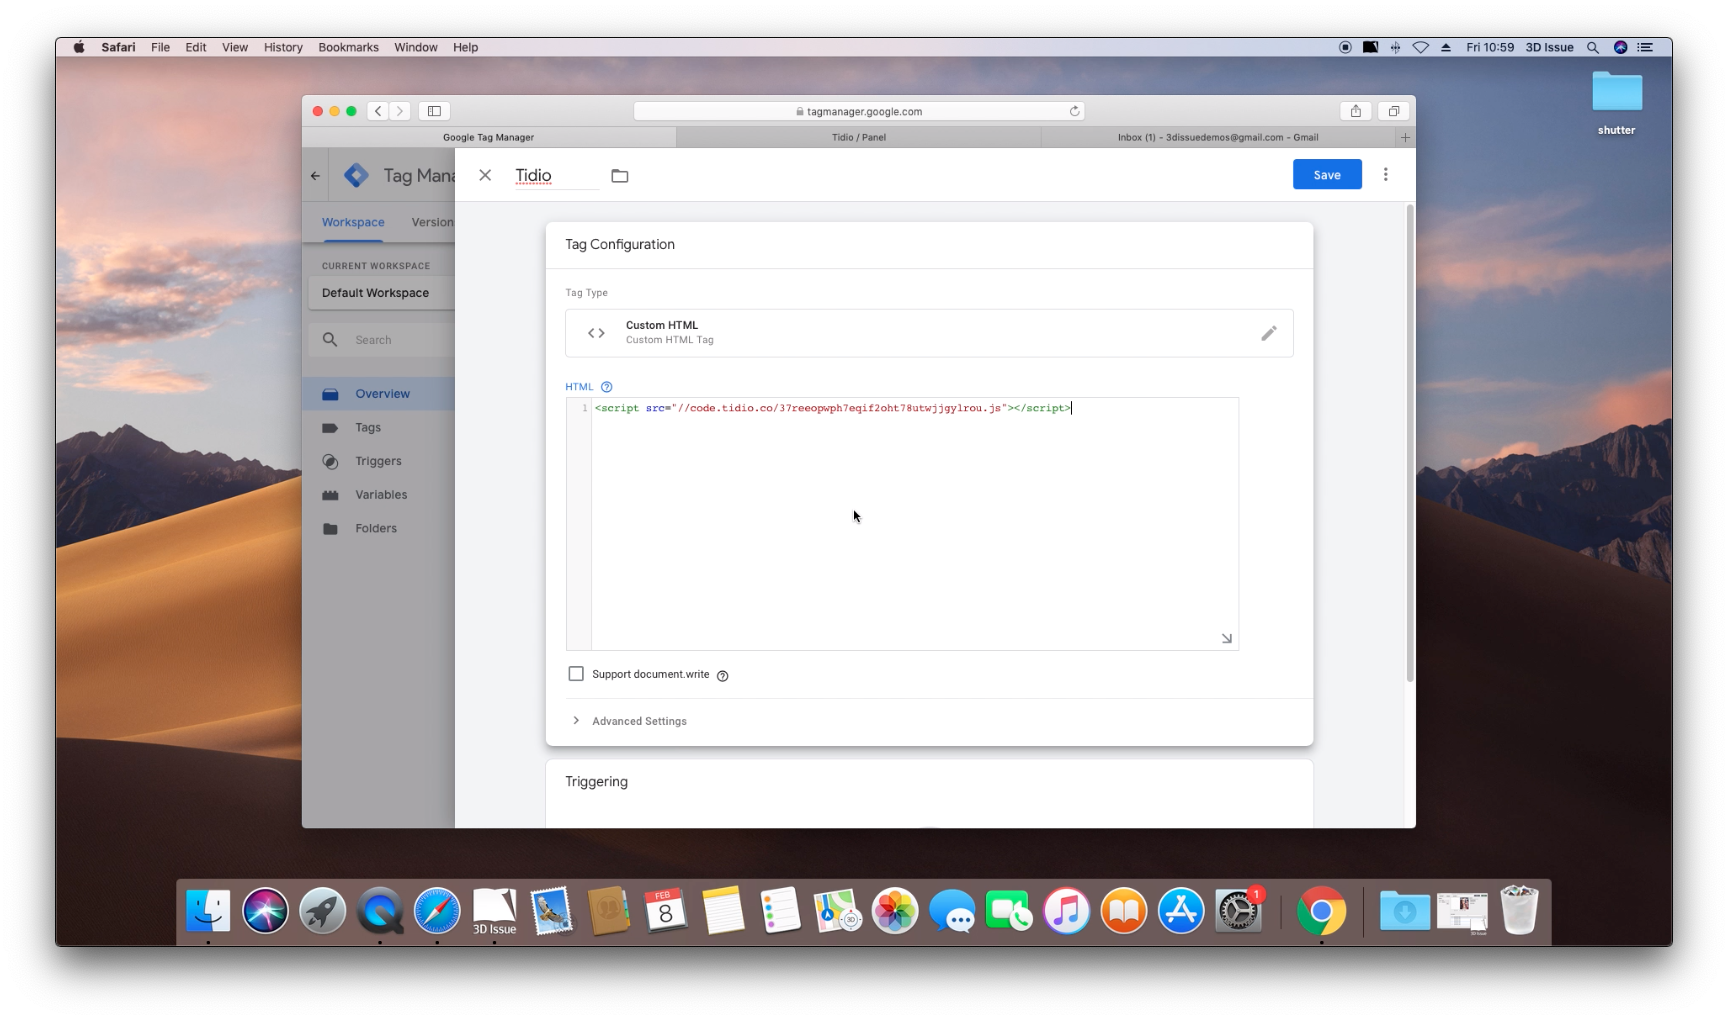
- Switch back to Tag manager
- Click Add a new tag

- Give your new Tag a name, we’ll call it Tidio so it’s easy to recognise.
- Click Tag Configuration to start adding your tag. In the pane that opens scroll down and select Custom HTML
- Now paste in your Tidio script.
- Scroll down to Triggering and click it.
- In the Pane that opens, check the box beside All Pages and click Add in the top right corner.
- Click Save
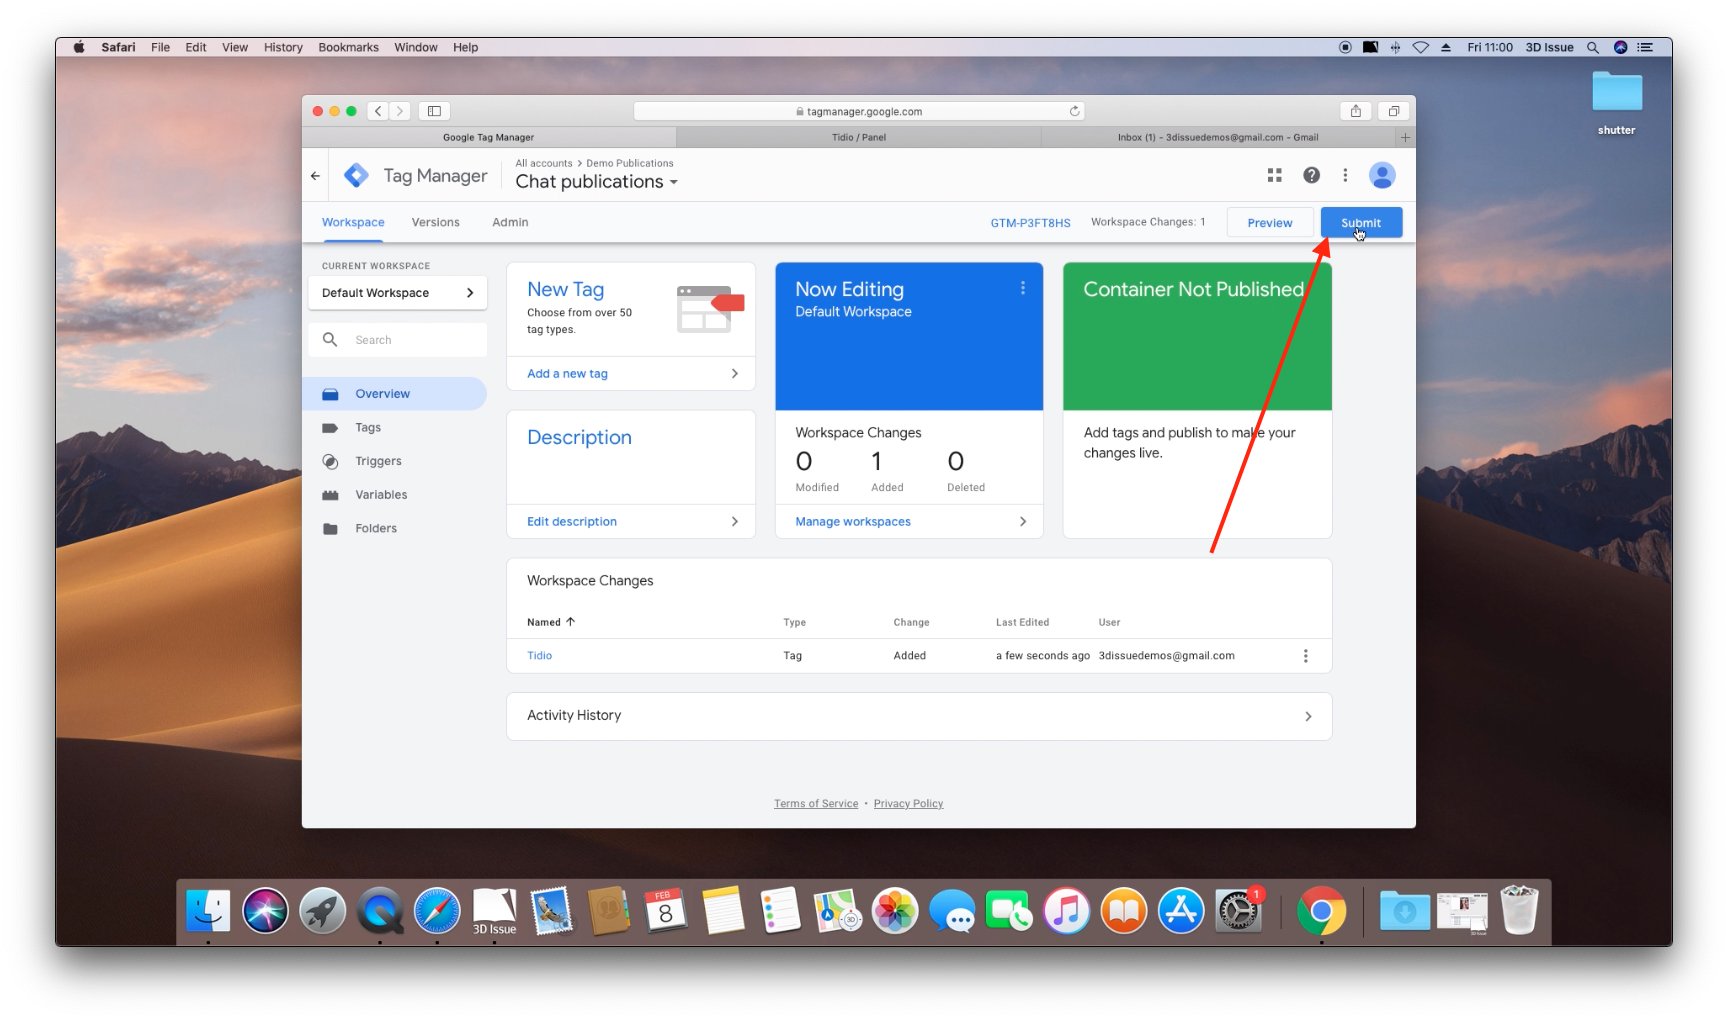
- You’ll be brought back to your Tag Manager Workspace.
Tag Manager requires you to Submit or Publish changes so we’ll need to do that. - Click Submit in the top right corner
- Give your Version a name (This can be anything). Click Publish
- Switch back to the workspace Tab in Tag Manager and click the GTM id along the top bar.
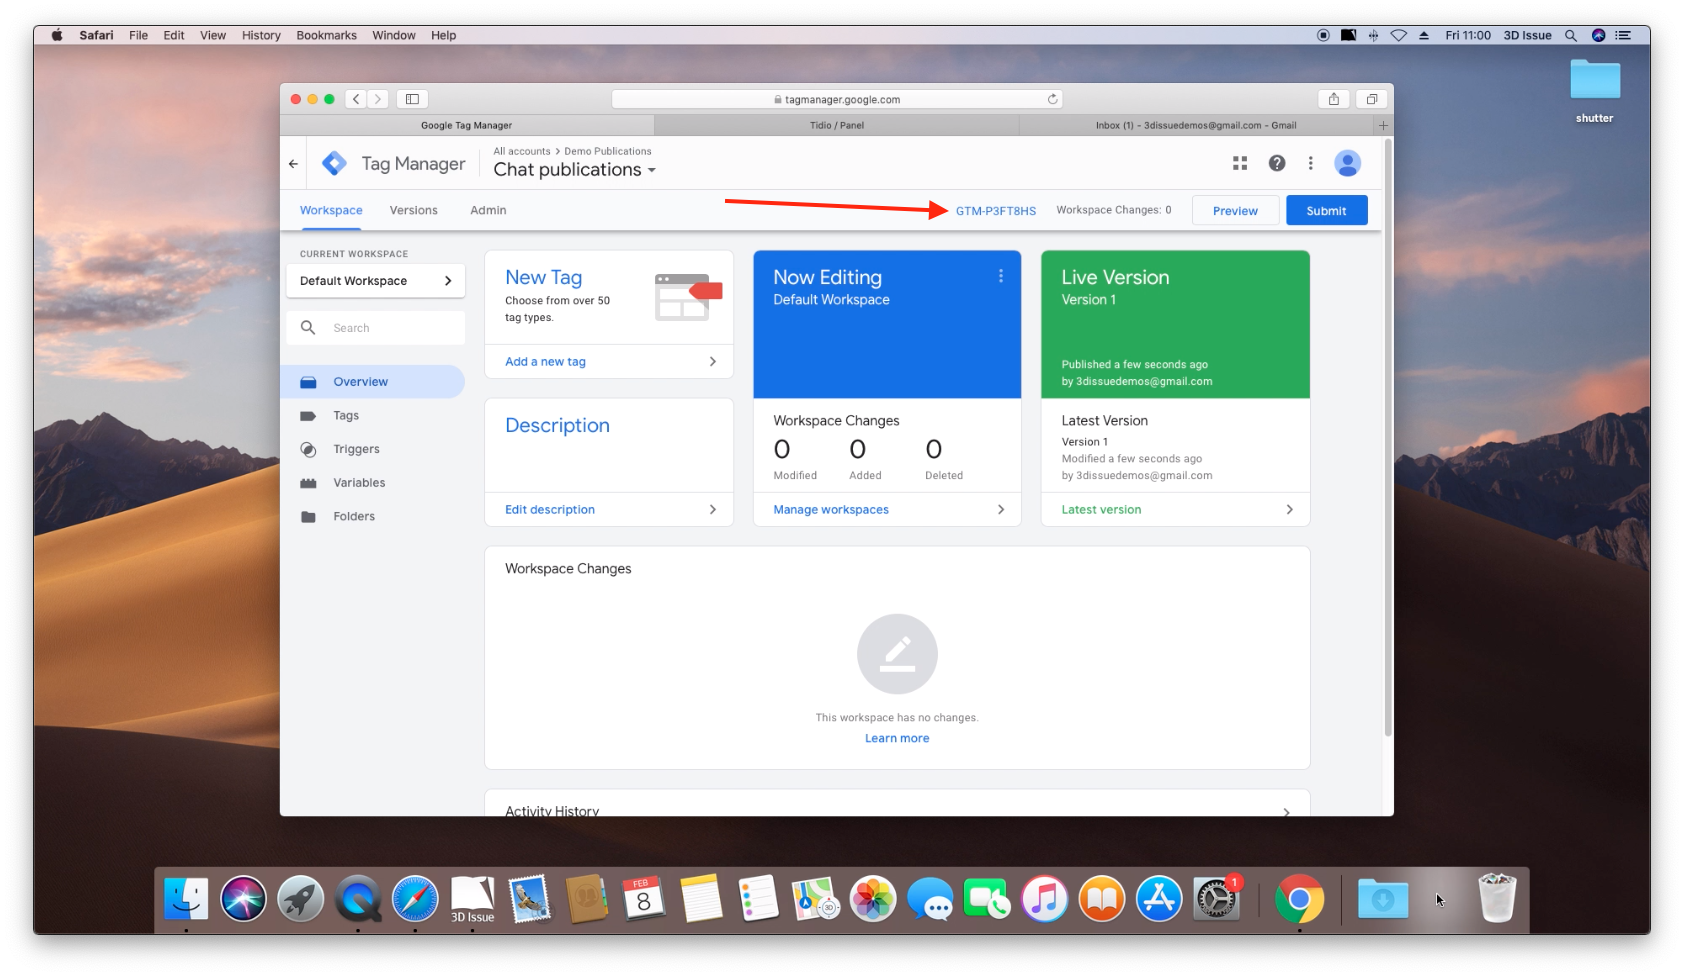
- In the Dialog that opens, locate and copy the GTM id.
- And that is Tag Manager and Tidio setup. Now we just need to add Tag Manager to Our Flipbook.
2. Add your Tag Manager ID to your Flipbook
- Launch 3D Issue 9.3 on your Computer and open or create the Flipbook you wish to add chat to.
- In the Content tab select the correct template and profile. Then select Setup
- In the window that opens select the Domains tab and next to the domain(s) your Flipbook will appear under paste in your Tag Manager ID that we copied earlier.
- Click Next, then Finish
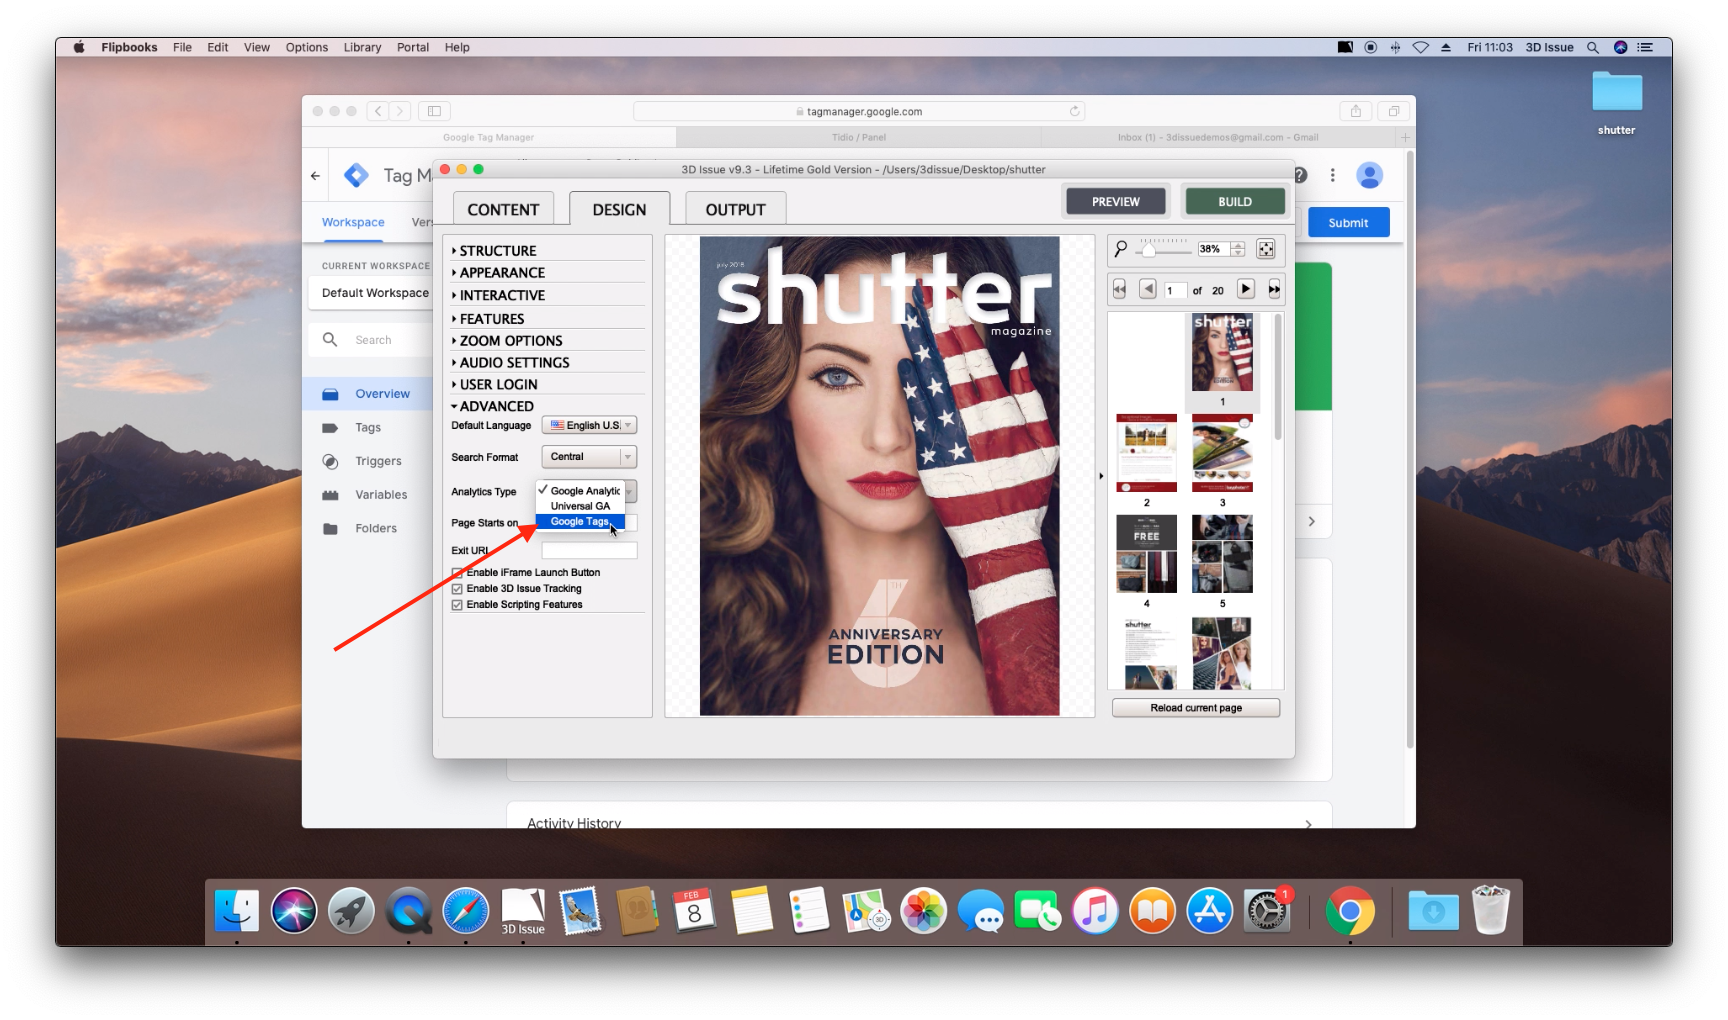
- Now switch to the Design tab.
- Expand the advanced Panel on the left.
- Next to Analytics Type select Google Tags.
- Build and upload your Flipbook, and then view it!
And that’s it! You can of course follow similar steps to add other features or services to your Flipbooks.