- Go to https://central.3dissue.com
/auth/login and login using the company admin accoun t. - This will take you to the Admin dashboar
d. - Once you‘ve accessed the Ad
min dashboard, please select t he Users menu and click Create User.

- Enter the new user’s Name, Email Address and Permission. We would recommend selecting REGULAR_USER. Then, click Create.

- An email will be sent to the email address that you entered. The user would just need to find the email and click on the enable your account link
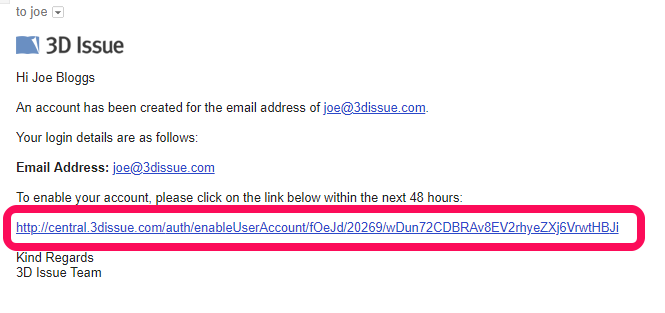
- When the user clicks the link, they will be taken to the set password page, where they should set a new password.
- Once the password has been set, the user will receive another email with a link to the login page. They can also login to any of our services as normal.
- Once the user has set their password, they should let the company admin know about this. The company admin would then need to access the Admin Dashboard > Users and click the Edit button to set the user’s permissions.
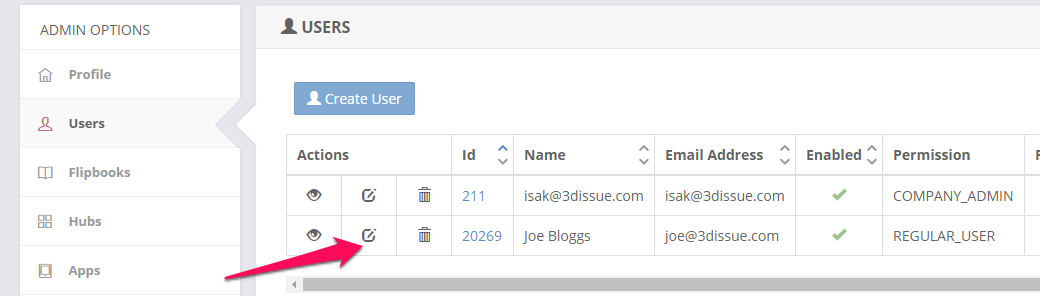
- After clicking the Edit button, scroll to the bottom of the page and the admin can then set;
1. How many issues this user can create
2. Assign Flipbook Brands

- When clicking Assign Flipbook Brand, the admin;
1. Selects what brand(s) the user has access to
2. They can set the access period.
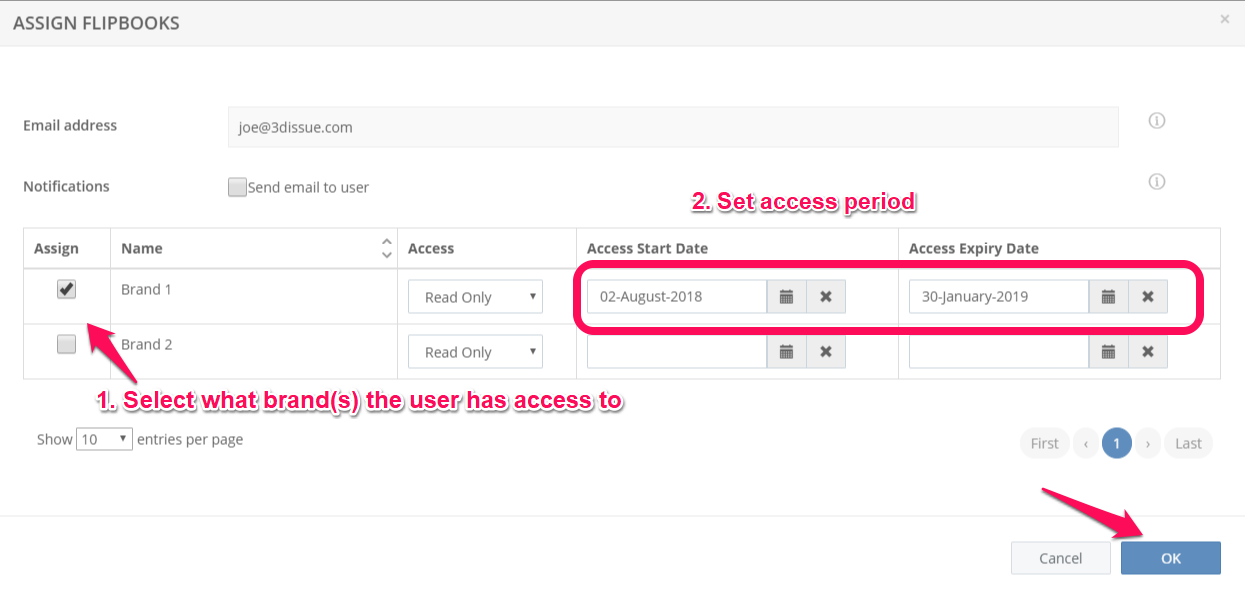
- Click OK.
- Scroll to the top of the Edit User page and click Update to finalize the user’s settings.

- The new user should now be able to sign-in and start creating issues.
Adding new users for Flipbooks Online
Updated on September 1, 2020