

Studio’s Form element collects responses from readers — a contact form, a survey, a sign-up — and hands each submission to an endpoint you choose. (For grid-based content layout, that’s the Table element’s job — see Working with Tables.) The element’s field types and settings are collected in Form.
Adding a Form
Open the Add panel and expand the Form section, then insert Form by clicking it or dragging it onto the canvas. Studio adds a ready-made contact form: Name, Email, and Message fields with a Send button — the fields ship with placeholder text (“Your name…”, “Your email…”, “Write something…”) that you can build on.
Field Properties
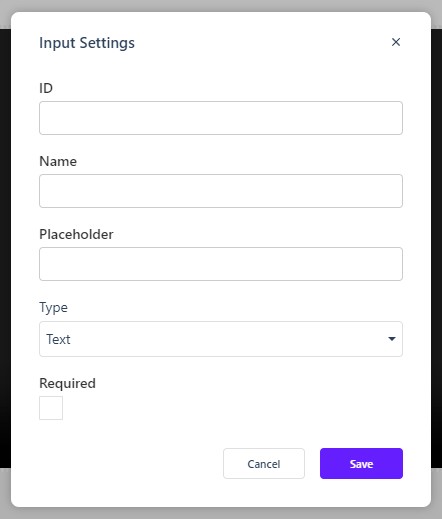
Each field’s Input Settings control what it collects and how it reads: an ID and Name (what your endpoint receives), a Placeholder, the field Type, and a Required toggle.
Form Settings
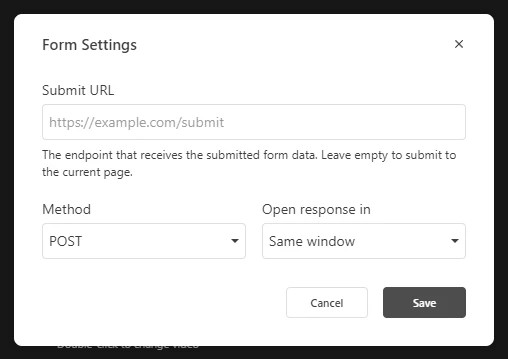
The form’s toolbar (Form Settings, Indent/Spacing, Background color, Duplicate, Delete) leads to the settings that decide where responses go:
- Submit URL — “The endpoint that receives the submitted form data. Leave empty to submit to the current page.”
- Method — POST or GET.
- Open response in — Same window or New window.
Forms submit like standard HTML forms, so the endpoint you supply (a form handler, a survey service, or your own script) determines how the responses are collected. Test the submission flow with a Preview before publishing.
What the platform stores of a submission, and why the form stays inert until a handler exists, is Can I create custom forms, and how do they send data?.