

You’ll end up with a Studio project built from your PDF, its pages turned into text and images you can edit rather than fixed page images.
You’ll need
- The PDF you are converting, prepared well enough that its images are worth importing.
- A project name, and the Brand whose fonts, colors and logos the project should start from.
- Enough AI credits. Conversion is charged at one credit per page (a 20-page PDF spends 20), and the AI Credits meter on the dashboard reads credits used against the month’s total (see AI credits: your allowance and what each tool costs).
You can use a PDF as the starting point for a Studio project. Studio’s AI Import Wizard converts each page (or selected pages) into responsive, editable content: text, and images become elements you refine, rather than the fixed layout they had on the page. That’s the difference from Replicate, which preserves the original design, so when you want the layout to adapt, import it here (see What is 3D Issue? Replicate, Flow, and Studio).
Running the import
- From the dashboard, click Studio under What would you like to create?.
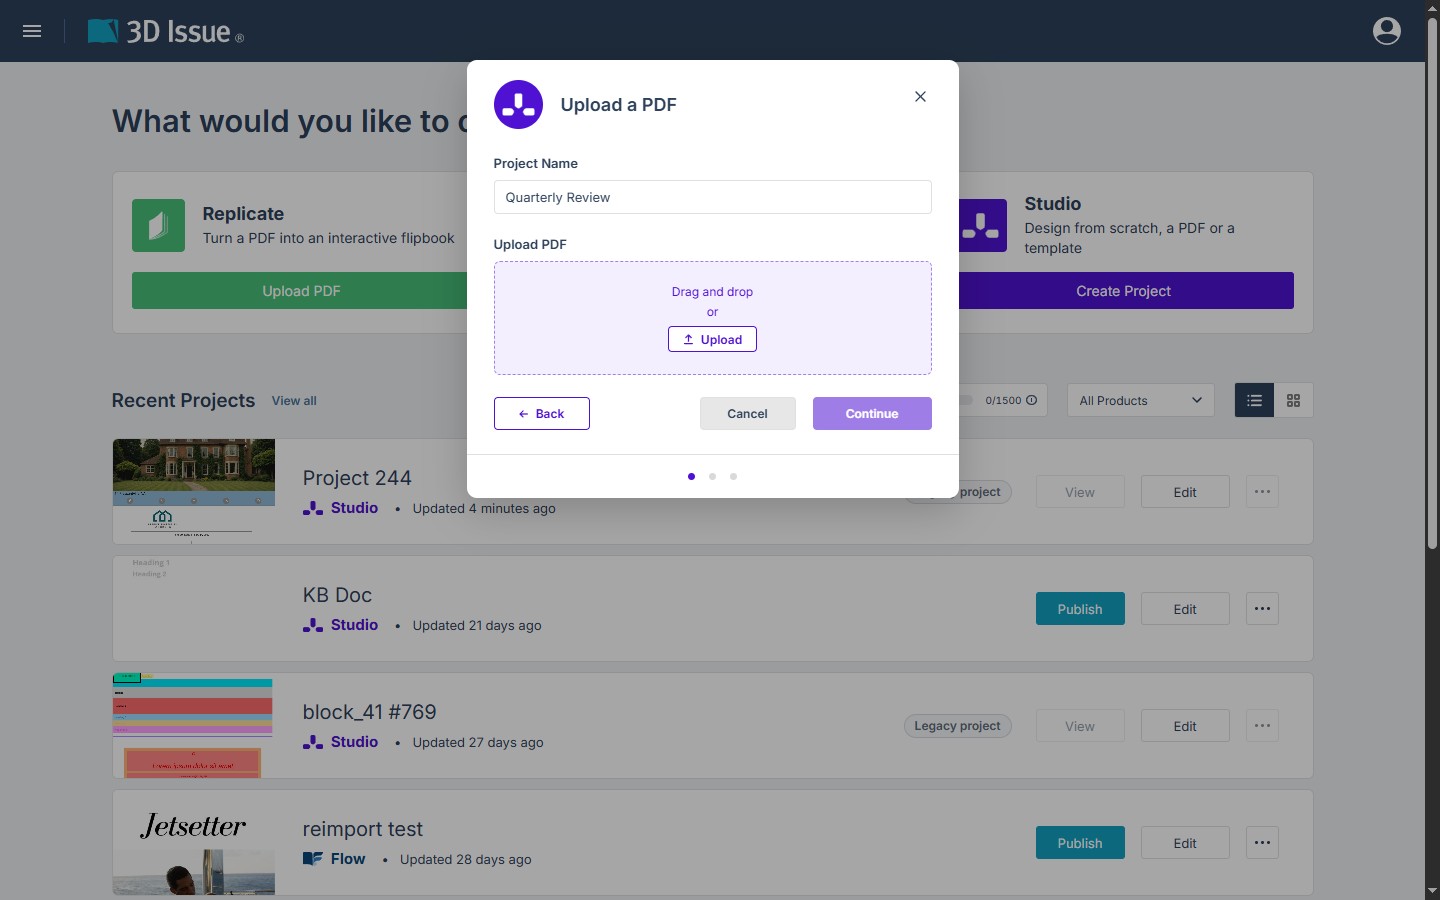
- In the Create Studio dialog, choose Upload a PDF and click Continue.
- The wizard opens on its first of three steps, titled Upload a PDF: type the Project Name, then drag your PDF onto the drop zone or click Upload. Back returns to the starting options and Cancel abandons the import.
- Click Continue: the conversion builds pages, text, and images as editable elements.
- Choose how Studio treats the source: Follow Source Structure keeps each page close to the original within Studio’s design rules, while Follow Suggested Structure reorganizes the content into a more web-friendly, responsive layout.
- On the page preview, use the eye icons to include or exclude pages, tag page types (cover, letter, article, back) to help the AI to understand your content, and select pages for merging using Shift or Ctrl (Option on Mac) to Merge Pages; the selected pages combine in the order you clicked them once you click Merge.
- Click Create Project: once Studio has processed your pdf, the editor will open with your converted content on the Canvas, ready for you to edit or refine.
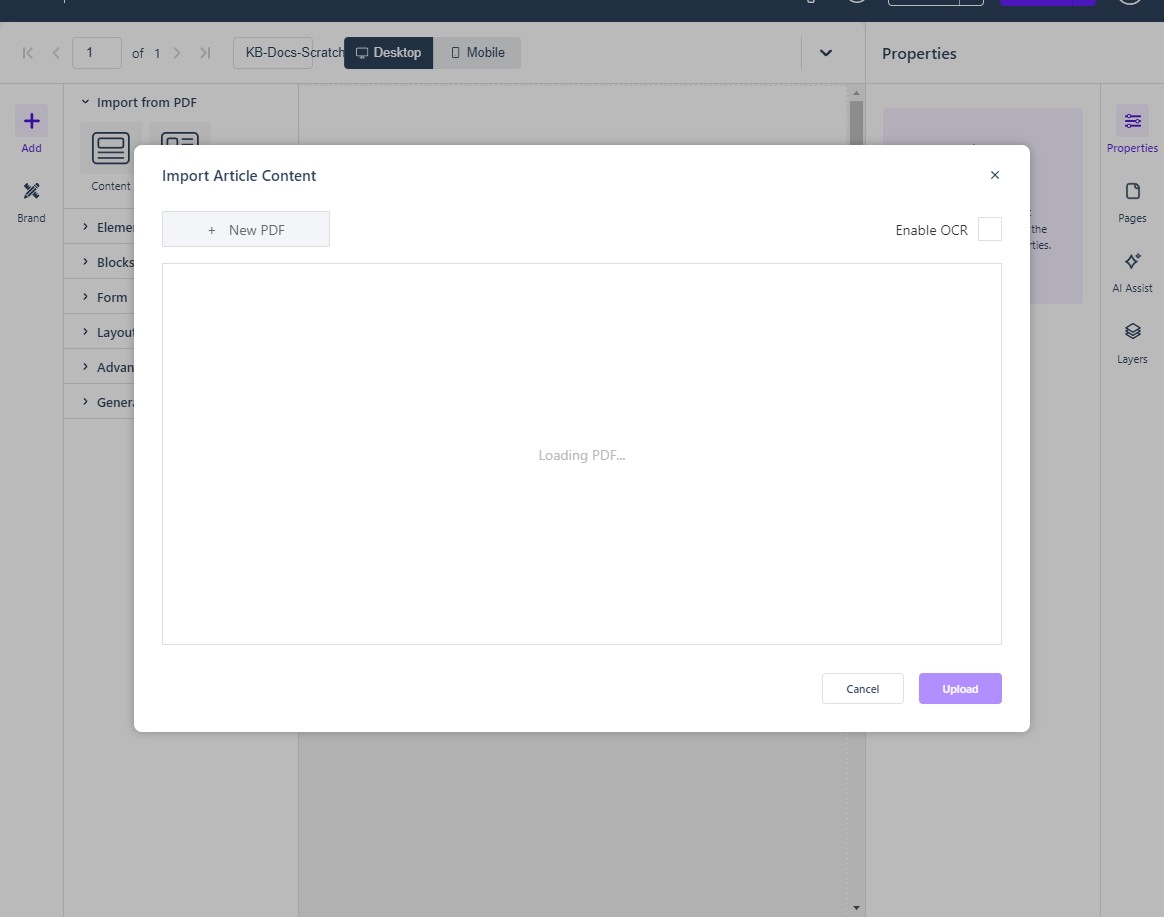
This wizard is Studio’s Article Importer, the tool for extracting an article’s text and images from a PDF and appending them to the current page. Pick the pages to import (up to three at a time), merge pages with Shift or Ctrl (Command on Mac) where the content spans them, and click Upload; Studio interprets the layout while it processes, then the imported content and structure land on the page. Anything the importer skips (smaller, less prominent images are commonly left out) can be recovered with the PDF clipping tool (see Working with Images, Galleries, and Logos).
For some tips on preparing your PDF for the best results, see Optimizing images for your publication.
When the wizard creates poor images
This is the import’s most common complaint, and the fix is a ladder; take the rung that costs the least:
- Fix the source, import again. If the PDF’s images are small or compressed, no wizard setting will save them. Re-export properly and run the import once more (see Optimizing images for your publication).
- Recapture from the source PDF. With the project open, Edit crop areas in the editor actions strip takes a fresh copy of an image region straight from the source PDF; hold Shift to select several areas, then add them to the page or save them to the Media Library and swap them in with Replace. (The detailed walkthrough is in Improving Your Flow Publication, whose editor shares the tool.)
- Rebuild the page. PDF reimport, in the actions strip for projects created from a PDF; re-runs the conversion for a page that came out badly (see Recovering your work: undo, versions, and reimport).
- Fix by hand. For complex images and odd type, editing the element directly is usually faster than any re-import (see Working with Images, Galleries, and Logos).
After the import
- Check both canvases. Converted content has a desktop and a mobile layout, and imported pages are exactly where mobile surprises live; switch the canvas to Mobile and page through (see Testing your publication on mobile devices).
- Set the structure before the styling. Give text elements their heading levels (see Setting the Text Type (Heading Levels)) and name any rows that will carry anchors (see Naming Rows and Creating Anchor Links); conversions rarely get structure right on their own.
- Add what the PDF can’t carry. Links, buttons, forms, and motion are added after import; see Adding Links, Buttons, and Social Sharing.
If it doesn’t work
- The images came out poor. Take the cheapest rung of the ladder above: fix the source and import again, recapture the area from the PDF, reimport the page, or edit the element by hand.
- The structure is wrong after conversion. Set the heading levels and row names by hand; conversions rarely get structure right on their own.
- The conversion does not finish. Import spends AI credits as it works, one per page, so once the meter shows the full total used there is nothing to draw on: the AI features wait for the next monthly refill (see What happens when the AI credits run out?).