


The Image element places a picture on the page. It is inserted into its own row on the canvas and gives you a floating toolbar plus a dedicated settings modal for controlling how the image fits its frame.
Adding an image
Open the Add panel and insert the Image element from the Elements list by clicking it or dragging it onto the canvas. Double-click the placeholder to add your picture.
The image toolbar
Once an image is on the canvas, its toolbar gives you:
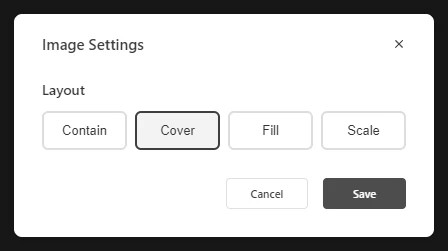
- Image Settings — choose how the picture fits its frame: Contain, Cover, Fill, or Scale, then Save or Cancel.
- Replace swaps the image while keeping its position and size.
- Crop — trim the image directly on the canvas, once a real image is placed.
- Link makes the image clickable.
- Indent / Spacing, Duplicate, Delete — the standard element actions.
How the image fits its frame
The Image Settings modal is where you choose the layout behavior:
- Contain fits the image inside the box without cropping.
- Cover fills the box and crops any overflow.
- Fill — stretches the image to fill the box.
- Scale — shrinks the image only, keeping its original ratio.

The Properties panel
Like every element, the Image exposes the full Properties panel (Size, Spacing, Background, Settings, Border, Animations, Advanced, Overlay, and Accessibility), so you can control its dimensions, spacing, and other appearance settings in the same place as the rest of your elements.
In Flow
In Flow, images are often added automatically during processing, so they can sometimes arrive oversized or poorly positioned. When that happens, the same image tools are available in the Flow editor: you can resize, reposition, crop, and adjust how the image fits its frame. Percentage-based sizing and spacing are especially useful in Flow, because they help the image adapt as the edition reflows.