

You’ll end up with a contents menu that travels with the published project and lists the destinations you chose.
You’ll need
- The project open in Studio, with the pages or URLs each item should point at decided.
- The titles readers will see for each item.
A contents menu gives readers a clickable list of destinations in your project — page by page, section by section. You build it once in Project Settings and it travels with the published version.
Enabling the Menu
- Click Project Settings in the top bar and switch to the Menu tab.
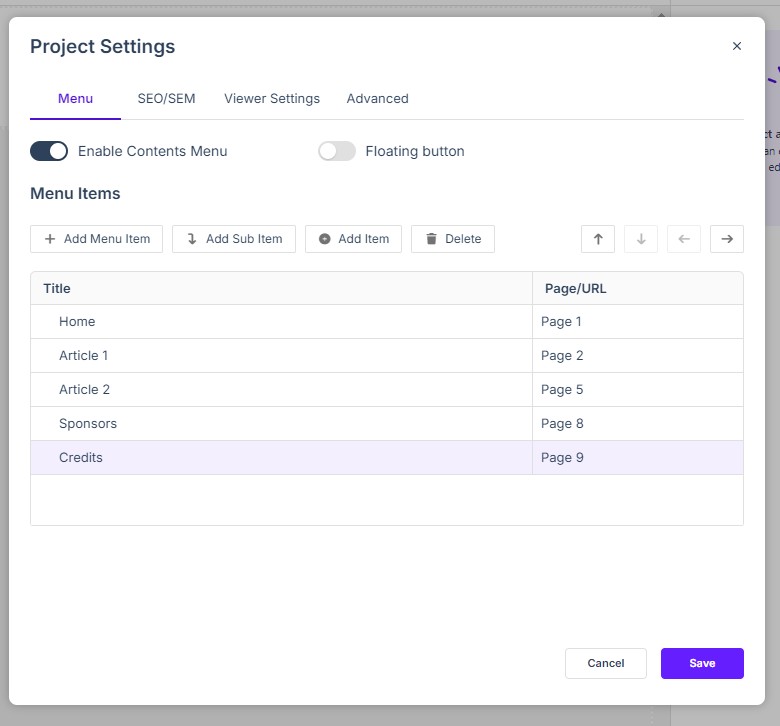
- Tick Enable Contents Menu. Until you do, the list reads: “No menu items. Click “Add Menu Item” to create your first item.”
- Optionally tick Floating button to offer the menu as a floating button readers can open anywhere in the project.
Building the Item List
- Add Menu Item creates a top-level entry; Add Sub Item nests a child beneath the selected item for grouped sections.
- Every item has a Title (what readers see) and a Page/URL target (where it leads).
- Selecting an item enables Add Item, Delete, Move Up, Move Down, Move Level Up, and Move Level Down — so you can reorder and re-nest entries without rebuilding them.
Where the Menu Appears
The Viewer Settings tab also contains a Menu section with a Menu type choice (None or Top) — whether readers see a menu across the top of the viewer. Set it to match how you want the project to open.
Click Save to keep your changes or Cancel to discard them; nothing applies until you save.
Menu items point at pages or URLs. For in-page jumps from links and buttons — for example, from a “Back to contents” link to the top of a long page — name the target row first, as described in Naming Rows and Creating Anchor Links.
If it doesn’t work
- Readers cannot see the menu. The Menu tab enables it, but whether it shows across the top of the viewer is the Menu type choice in Viewer Settings (None or Top) — set it to match how the project should open.
- Your changes did not stick. Nothing applies until you click Save; Cancel discards them.