

By default, a published flipbook opens for anyone who has the link: no account, no password. If your content needs to be restricted to specific readers, that’s reader login: the publication asks a reader for credentials before it lets them in.
Accessing Login Functionality: the Brand’s User Login tab
Reader login is configured on the Brands screen ( user menu → Brands, product selector on Replicate) on the User Login tab. The tab has two cards:
- API access holds Endpoint URL (your web service that answers login checks), Token with a Generate token button, and a Verify Details button to test the pair.
- Login behaviour controls when the login appears: Disable login (login not required), Login on start, Login on first zoom, Login after pages, Login after time. Below the radios: Register link and Forgot password link.
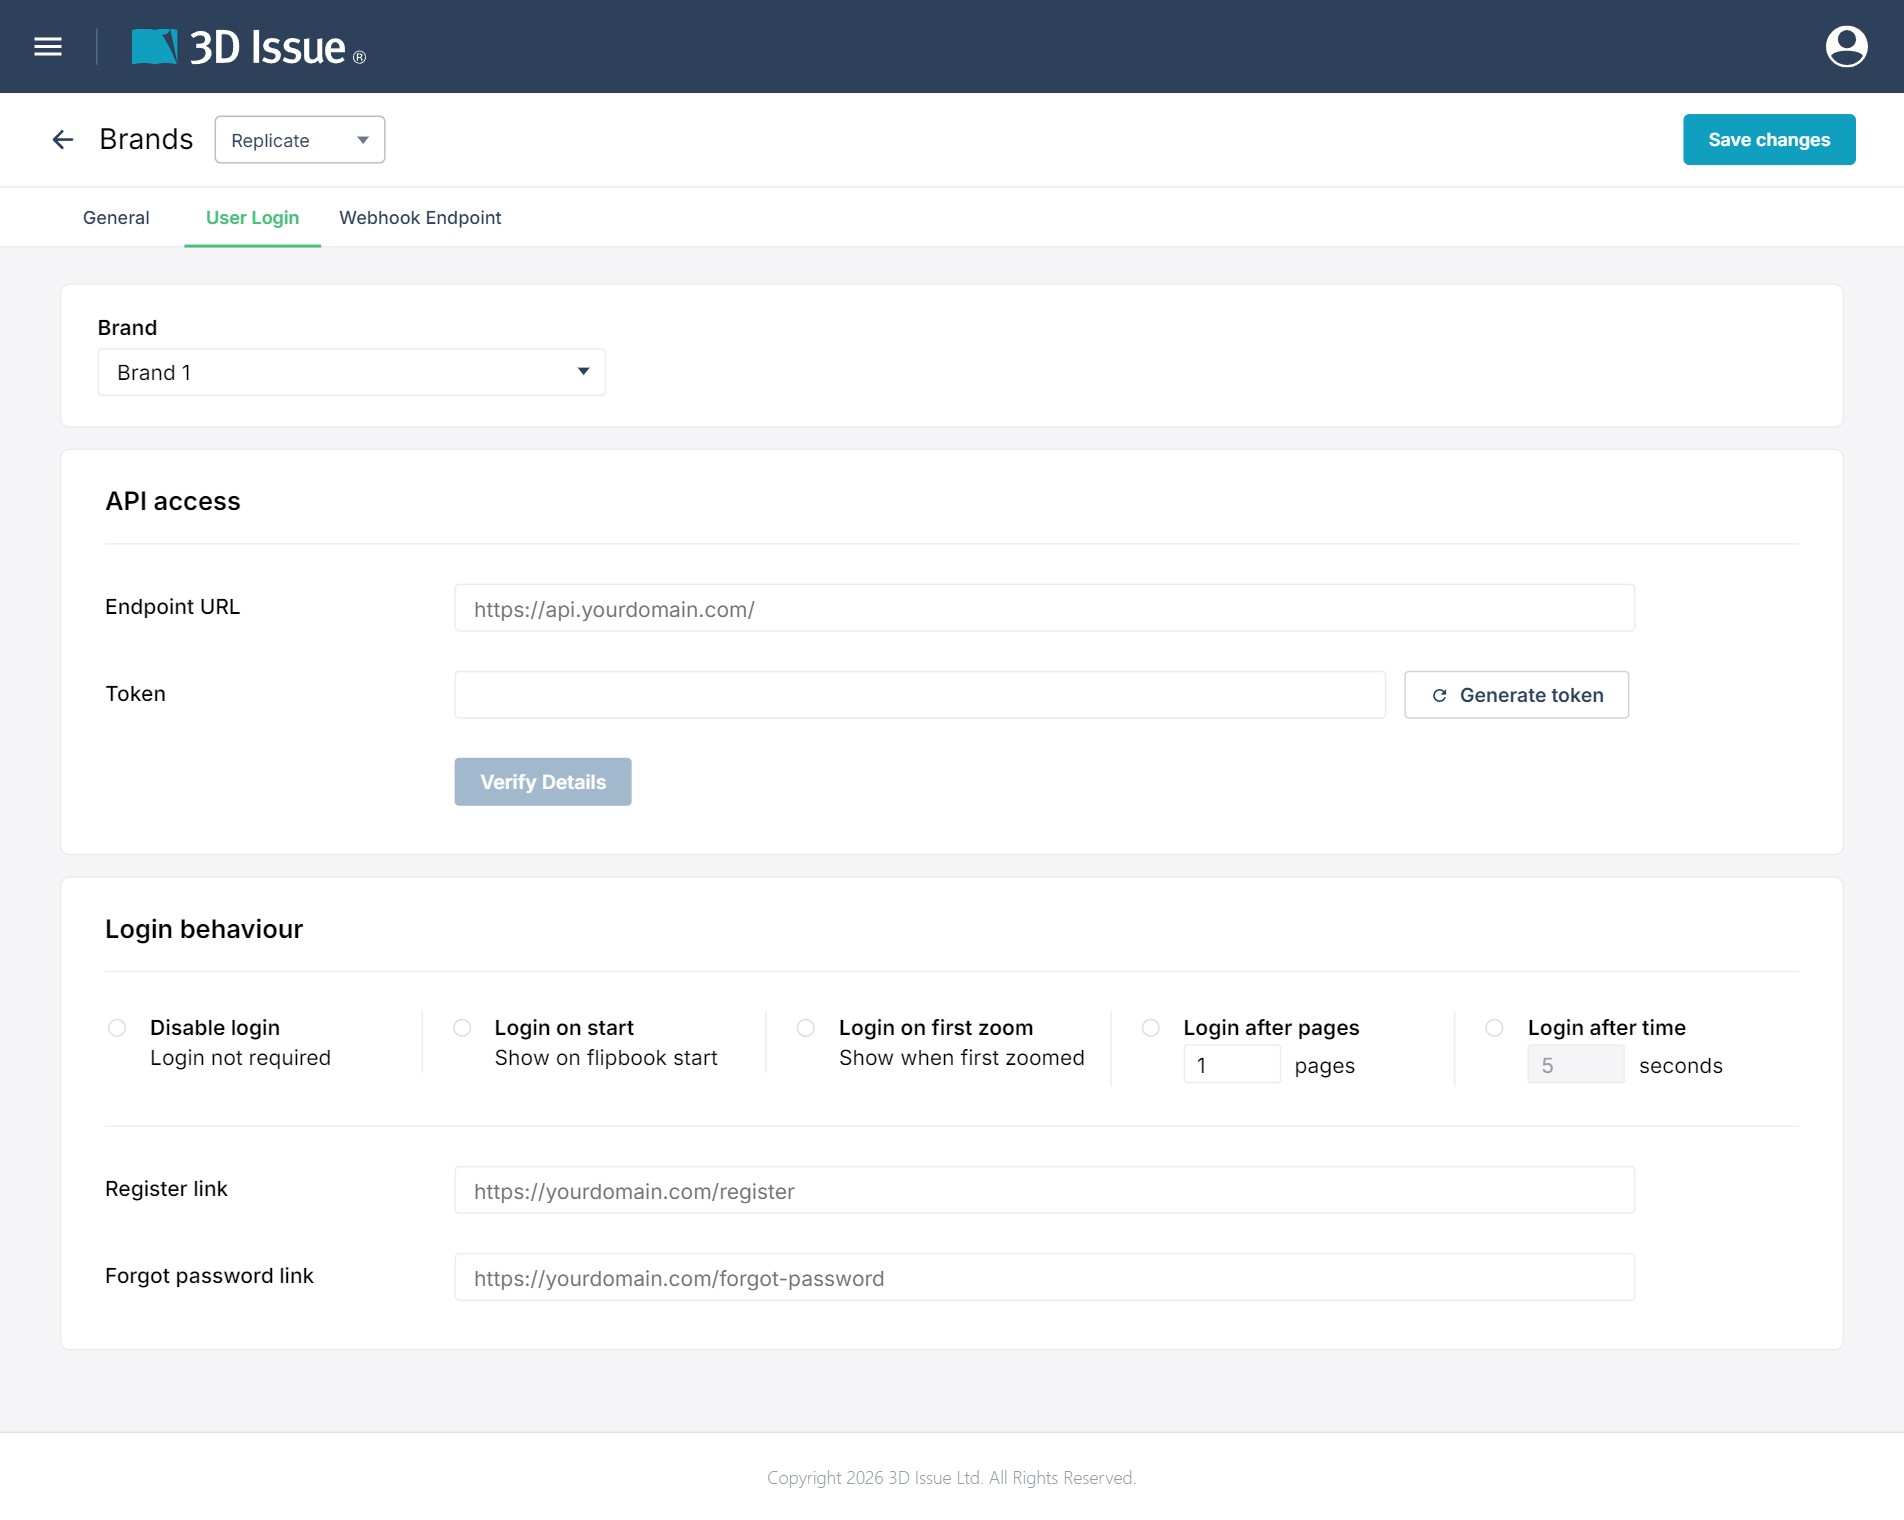
The full field-by-field walkthrough of this tab is in Brand settings (Replicate). The flipbook inherits a brand’s login behaviour when the brand is assigned to it, which happens on the dashboard tile under ⋯ → Settings → Brand.
The login options, explained
What each behavior option does when the publication is live:
- Login on start — the issue locks as soon as it loads; readers can’t move past page 1 until they authenticate.
- Login on first zoom — readers can see the cover, but the first zoom triggers the login.
- Login after pages — use the arrows to set the last page a reader can view without logging in; the issue locks then.
- Login after time — use the arrows to set a length of time (seconds) the reader can view the issue before it locks.
- Disable login — turns all user login off for the brand.
- Register link / Forgot password link — URLs that show as buttons on the login popup; leave them empty if you don’t want the buttons.
Custom User Login: your web service validates your readers
Custom User Login integrates the platform’s login with your existing login system: when a reader attempts to log in, the platform makes a REST request to your system to validate the user.
What the web service accepts
The request carries four parameters, sent unaltered:
userName: the credentials the reader typed into the login popup.password: as above.publicationURL: the address of the flipbook being viewed.issueName: the flipbook’s identifier.
An example request to your web service:
https://api.mydomain.com/login?userName=jeff&password=supersecret123&publicationURL=https://cloud.3dissue.net/1/1/1/1234/index.html&issueName=1234
Support SSL or TLS on your web server: the credentials travel across it, and the recommendation is to secure the communication between the platform and your system.
Expected responses
A valid login returns:
{"loginValid":"true"}
An invalid login returns:
{"loginValid":"false"}
With the token in place, your server can also reject requests that don’t carry the expected token alongside the endpoint.
Testing the setup before your readers do
Once the endpoint URL and token are filled in, Verify Details tests the pair: it opens a Verify User Login prompt where you enter a test username and password and OK it; a valid check replies with a verified message, an invalid one with a not-verified message. If a rejection wasn’t expected, re-check the endpoint, token, and the web service’s responses before publishing anything.