

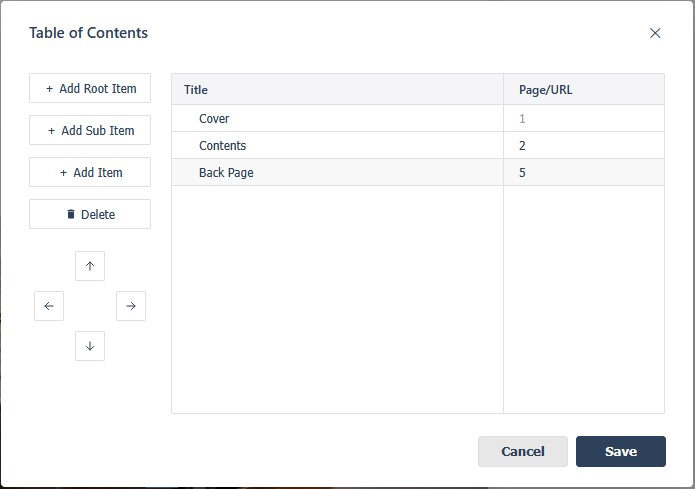
The Table Of Contents editor builds the contents list your readers open from the flipbook’s menu, an alternative way to navigate the publication alongside paging. You can open it from the settings panel’s Appearance section (see Appearance settings). The editor opens as its own dialog.
Building the list
Entries are organized hierarchically: root items are the most prominent, and each can contain sub-items. The left-hand buttons build the structure:
- + Add Root Item creates a new top-level entry.
- + Add Sub Item creates a child entry under the currently selected one.
- + Add Item creates an entry at the same level as the currently selected one.
Every entry has a Title and a destination in its Page/URL column: a page number links inside your publication (1 is the cover; 2, 5… are the pages that follow), and a full https://… URL links to an external website. A freshly added entry shows empty fields ready to edit.
Moving and removing entries
- ↑ / ↓ (arrows) move the selected entry up or down within its level (entry order in the table is reader order).
- ← / → (arrows) demote or promote the selected entry between levels: promoting a sub-item to root, or pulling a root item under the entry above.
- Delete removes the selected entry (with its sub-tree).
Saving (and canceling)
Save applies the list and closes the editor; Cancel closes without applying your changes. Readers see the new contents the next time the publication is published — an unpublished edit isn’t live yet.