

You’ll end up with the flipbook built and uploaded to your own server, and its address shown when the build finishes.
You’ll need
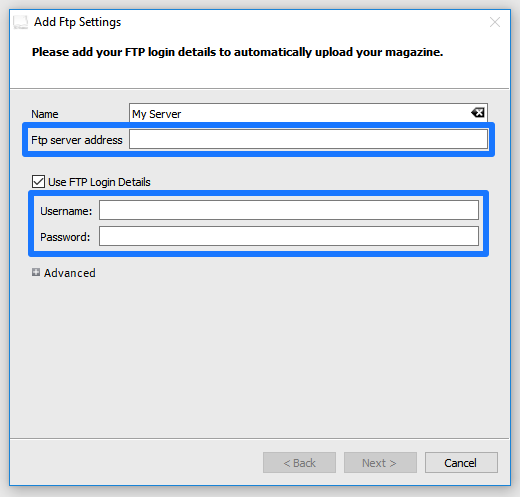
- The FTP server address, and the FTP username and password, from your host or webmaster.
- The PDF imported into the software.
The software has a built-in FTP client that you only have to set up once. When you click Build it builds and uploads the flipbook, then shows its web link, for example www.yourdomain.com/foldername/issuename.
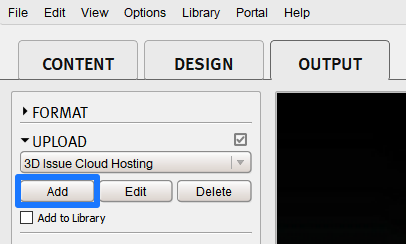
- In the OUTPUT tab, under Upload, click Add.
- Enter the FTP server address and your login details in the dialog that appears.
- Leave the new entry selected in the drop-down under Upload — it stays selected for later builds.
- Click Build.
FTP and FTPS are supported; SFTP is not available yet. A flipbook that uploads but hangs on its preloader is usually the server’s file types rather than the upload: Server Configuration covers the IIS and MIME settings. If you would rather not run a server of your own, Cloud Services can host the publication instead: How do I upload my Flipbooks to your cloud servers?.
If it doesn’t work
- Nothing arrives on the server. The upload follows the entry selected in the hosting drop-down, so check that your FTP entry is the one chosen, then build again.
- You would rather not use the built-in client. The project folder can be uploaded by hand instead — see Publishing, sharing & embedding your flipbook.
- The details are wrong or the server refuses the connection. Email support@3dissue.com.