

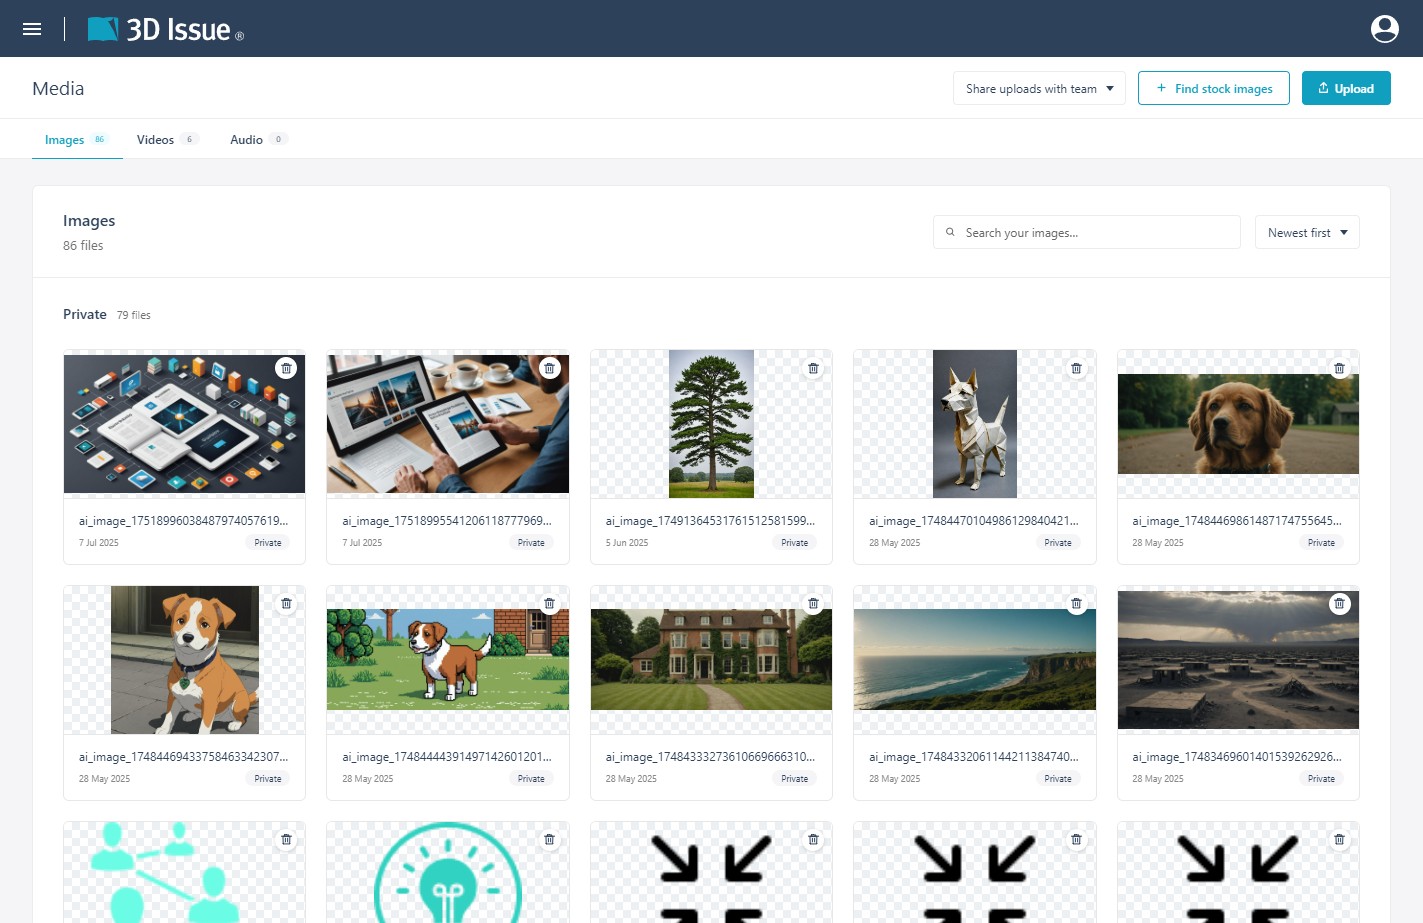
The Media library stores every image, video, and audio file your team uploads, ready to drop into any project. Open it from the user menu with Media.
Uploading Files
Click Upload and choose your media files, or alternatively drag and drop them anywhere in the panel from your file browser. Choose an Upload visibility first:
- Share uploads with team places new files in the Shared with team section where colleagues can use them
- Private uploads only leaves them only accessible to you.
Adding Stock Files
Click Find stock images or Find stock video to browse royalty-free stock content without leaving the dashboard. Search using the search box, select an image/video and click Import selected.
Finding Files
- Type tabs: Filter by Images, Videos, or Audio — each tab shows its file count.
- Search: Search images by filename.
- Sort: Newest first or Name A–Z.
Visibility and Cleanup
Every file belongs to one of the two sections — Private or Shared with team — and shows its upload date. Click on the Delete icon for an image when it is no longer needed. Files deleted here will still appear in projects in which they have previously been used.
Where Media Appears
Project images, gallery contents (via From Library in Gallery Settings), and the stock-image browser all draw from this one library, so a file uploaded once is available in every project you own — and in your teammates’ projects if it is shared with the team.