

You’ll end up with a named row that links can jump to, and a link that actually lands on it.
You’ll need
- The row you want to link to, and the short name it will answer to.
- The link that should jump there — a Go To Page link with an Anchor field.
Every row in Studio can be given a name. This turns the row into an anchor that links can jump to.
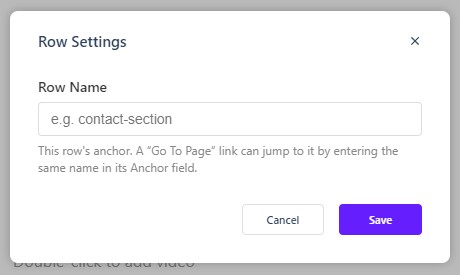
Naming a Row
- Select the row on the canvas to reveal its floating toolbar.
- Click the Row Settings (cog) icon to open the Row Settings modal.
- Enter a name in the Row Name field, such as
contact-section. - Click Save to apply the name, or Cancel to discard it.
- You can also name a row using the Settings section of the Properties Control Column.
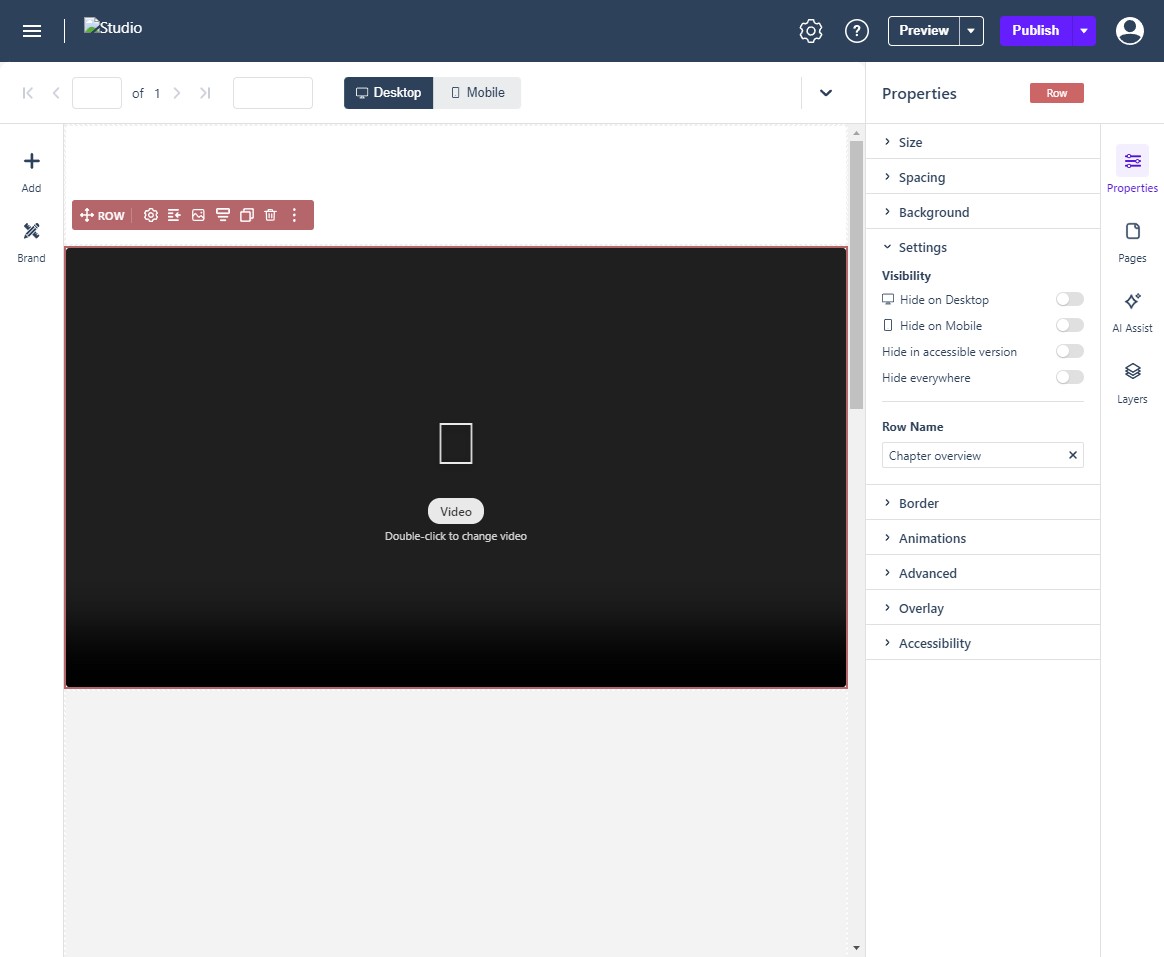
Jumping to a Named Row
Once a row has a name, any Go To Page link in your project can target it: enter the same name in the link’s Anchor field, and readers who activate the link will jump straight to that row. Row names must match exactly, so it is worth keeping them short, lowercase, and hyphenated (for example pricing or chapter-2).
If it doesn’t work
- The link goes nowhere. Row names must match exactly: compare the Row Name field with the link’s Anchor field for case, hyphens and spelling.